功能
 网络健康扫描器
用于检测网络问题的诊断工具:
- 环路检测:扫描你的 AE2 网络以查找可能导致网络不稳定的电缆环路。请注意,环路并不一定是个问题,因为 AE2 可以很好地处理它们,但在某些特定情况下可能会引发问题。只有在排除了所有其他潜在问题后,环路的检测才有意义。
- 非加载区块组件检测:识别位于未加载区块中的网络组件。卸载区块中的电缆和无线连接器也应被检测到(只要它们连接到已加载的区块),但由于量子桥仅在区块加载时注册,因此无法检测到卸载的量子桥。检测它们将涉及扫描世界中每个未加载的区块。
- 频道瓶颈:找出频道需求超过电缆容量的位置,并提供按方向的流量细分。由于 AE2 计算频道流量的方式存在细微差异,检测到的确切瓶颈可能与电缆实际看到的情况有所不同,但它仍能让你对瓶颈所在位置有一个很好的了解。
- 缺失频道:列出需要频道但未能获取频道的设备。此类通常与瓶颈配合使用,因为它们指出了频道缺失的确切位置。为瓶颈提供足够的频道应能使这些问题消失。
- 配方问题:检测网络中配方的问题,例如:
- 重复输出:多个配方生产相同的物品,这将导致冲突。AE2 会随机选择其中一个配方,这可能导致不可预测的合成行为。
- 损坏的配方:其配方不再有效的合成配方,通常是由于模组更新/移除所致。这些配方将被合成系统忽略,如果它们在任何活跃配方中被使用,可能会导致合成失败。
- 嵌套配方:需要将输出作为输入的配方。这些配方将无法进行合成,因为 AE2 无法处理这类配方。请注意,这无法检测配方的环路,只能检测配方中的直接自依赖关系,因为检测配方环路需要模拟每个配方的合成过程,这在性能上非常昂贵。
- 致命错误:检测可能导致网络降级运行或完全无法工作的关键问题。由于这些问题较为罕见,它们被聚合在一起,而不是拥有独立的类别。目前包括:
- 主网络通过子网连接到自身:这会创建一个导致幽灵物品、不同步和整体不稳定性的环路。
- 同一方块上的多个存储总线:这会导致双重计数(幽灵物品),从而引起不同步和不稳定性。
- AE2 多维块位于区块边界:多维块(量子桥、CPU 集群)可能在区块加载时损坏。
- 视觉覆盖层:显示指向问题位置的 directional arrows(方向箭头)。
- 交互式 GUI:浏览并选择检测到的问题,按维度组织。
- 子网扫描:切换是否在扫描中包含来自连接子网的组件。
用法:
- 右键点击任何网络组件以启动扫描
- 右键点击空气以打开结果 GUI
- Shift+右键点击以切换覆盖层显示
 优先级调节器
用于快速设置和应用存储优先级的工具:
- 设置优先级:Shift+右键点击空气以打开 GUI 并设置存储的优先级值
- 应用优先级:右键点击任何 AE2 方块以应用存储的优先级
- 自动应用:当在主手副槽持有时,放置 AE2 方块会自动应用存储的优先级
用法:
- Shift+右键点击空气以打开优先级 GUI 并设置存储的值
- 右键点击 AE2 方块(ME 驱动器、ME 储物箱、总线等)以应用存储的优先级
- 在主手副槽持有以在放置方块时自动应用优先级
 卡片分配器
一种将库存中的卡片分发给网络上分子装配机的工具。支持:
 更好的等级维护器
一个通过在 AE2 网络中安排合成工作来自动维持物品数量的方块。
功能:
- 多种配方:管理无限(ish)数量的待维持项目(支持物品、流体和气体)。
- 目标数量:为每种物品设置期望的数量(Shift+滚轮滚动条目以快速加倍/减半数量)。
- 批量合成:配置每次运行要合成的物品数量。维护器不会请求少于批次大小的数量,因此不要将其设置得太高,否则如果网络无法达到所需的输入资源量,你最终可能根本没有任何请求。
- 可自定义频率:设置检查间隔,从秒到天数不等(按住 Ctrl 并滚动滚轮可快速加倍或减半时间)。
- CPU 管理:当没有可用 CPU 时,自动将任务排队,直到达到一定上限(可配置)。超出此限制的任务将被标记为“错误”,直到再次有 CPU 可用。这可以防止维护者在网络负载过重或无法跟上需求时安排过多无法管理的任务。
- 状态指示器:通过视觉颜色编码显示每个配方的状态:
- 灰色:配方已禁用(点击物品名称或右键点击条目以启用/禁用)
- 无颜色:空闲,等待下次检查
- 浅蓝色:已计划运行
- 绿色:正在制作中
- 黄色:停滞(等待资源)
- 红色:错误(无配方、无 CPU、缺少资源)
- 紫色:制作后错误(输出空间不足)
用法:
- 1. 放置 Better Level Maintainer 方块并右键打开 GUI
- 点击空槽位以添加配方
- 在模态窗口中,点击物品槽位以从你的网络中选择可制作的物品
- 设置目标数量(你想要维持的物品数量)
- 设置批次大小(一次性制作多少)
- 设置频率(多久检查一次,例如 "1h 30m" 表示每 1.5 小时)
- 当数量低于目标值时,维护者将自动制作物品
提示:
- 将批次大小设置得较高以避免频繁制作(你甚至可以将其设置为目标数量的数倍)。请注意不要设置过高,因为这可能导致资源短缺或制作失败,如果网络无法跟上需求的话。
- 使用子网来减少计算配方时的负载,因为负载随网络中的物品和模式数量而扩展。
- 尽量保持配方简单,避免长制作链,因为它们的计算和调度成本呈指数级增长。
- 优先使用较长的检查间隔。你可以选择每 100 分钟批量制作 10k 个,而不是每分钟制作 100 个,这对网络负担更小,同时仍能保持库存在所需水平。
- 确保你有足够的 CPU、能源和制作资源来跟上计划的任务,特别是当你有很多配方、长配方或短检查间隔时。
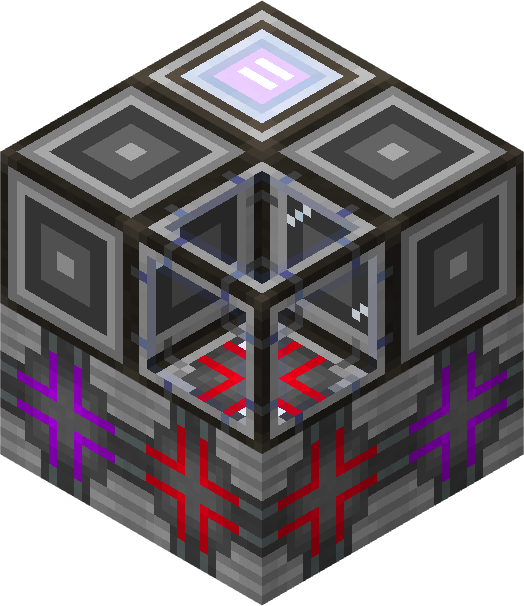 AutoCrafter
一个强大的自动化方块,使用来自 AE2 网络的模式自动制作物品。把它想象成一个拥有 12 个配方槽位的 RFTools Crafter,并将整个 AE2 网络同时作为输入和输出。 你可以通过在子网中使用它来按需使用:接口(主网)-> 接口(子网)-> AutoCrafter -> 仅插入存储总线(子网)-> 接口(主网)。
功能:
- 12 个配方槽位:最多可配置 12 种不同的配方。
- 模式支持:插入任何 AE2 制作模式来定义配方(由于显而易见的原因,不适用于 PROCESSING 模式)。你可以通过手持它们右键点击方块从外部插入模式,或者通过将它们放入每个配方条目的模式槽位从内部插入。
- 模式多功能工具支持:如果你的背包/baubles 中有 Pattern Multi-Tool,你可以直接从 AutoCrafter GUI 访问其模式。x2/x3/+1 按钮不起作用,因为它们对 CRAFTING 模式没有意义(在使用时将模式转换为 PROCESSING 模式)。
- 配方预览:可视化 3x3 输入网格,显示所需的材料和输出。
- 催化剂库存:每个配方拥有本地 9 格内部库存,用于可重复使用/复制的物品,或具有耐久度的中介工具(如果上一个配方没有完全消耗它们)。AE2 在处理制作配方中的可重复使用或嵌套物品方面 notoriously bad(臭名昭著地糟糕),因此这是一个必要的变通方法,以便能够在自动化中使用它们。
- 性能优化:加载时缓存配方模拟,仅在配方更改时重新计算。这意味着昂贵部分(就制作而言)只执行一次,然后 AutoCrafter 将仅依赖缓存的结果进行后续制作,速度非常快。
- 批量制作:配置每次操作制作多少物品,同时相应降低制作速度。批次大小为 50x 意味着 50 倍的输入,得到 50 倍的输出,但运行速度将是 1/50。它每秒消耗的资源量相同,只是以更大、更慢的突发形式进行。这对性能非常理想,因为资源的导入/导出运行频率更低,同时保持相同的总体吞吐量。可以使用 Crafter Speed Upgrade 卡(I/II/III/IV 级)进一步增加此批次大小,且没有速度惩罚(批次大小增加而不是速度增加,以避免向网络发送垃圾信息从而导致卡顿)。基础每次操作的批次可以在配置中设置。
- 速度控制:设置制作间隔从 1 秒到天数(1s, 1m, 1h, 1d 增量)。注意:此设置明确减慢了制作速度。你可能希望改用“批次大小”,以便在不降低整体制作速度的情况下每次操作制作更多物品。
- 部分合成:如果资源不足以完成完整批次量的合成,合成器会自动缩小批次量,以利用现有资源尽可能多地合成物品,而不是仅仅等待积攒足够一整批的资源。你可以在「概览」页面查看每个配方的精确错误率(参见状态指示)和占用率(配方被缩小的程度)统计数据,从而帮助识别瓶颈或资源短缺。一个配方的效率百分比可计算为 (1 - 错误率%) * 占用率%,因此,如果一个配方有 50% 的错误率和 50% 的占用率,其整体效率将为 25%;而一个拥有 0% 错误率和 50% 占用率的配方,其整体效率则为 50%。
- 网络集成:自动从 ME 存储中提取输入并将输出插入回去。没有外部库存,整个网络就是库存。只需确保有足够的驱动器/接口/存储总线来容纳所需的物品,AutoCrafter 就会处理其余部分。
- 状态指示:每种配方条目的颜色编码状态:
- 灰色(已禁用):配方已禁用
- 无颜色(空闲):等待下一个合成周期
- 橙色(缺少催化剂):所需的催化剂物品(需在内部库存中手动插入)
- 红色(缺少输入):网络中不可用所需原料(甚至无法制作单个物品)
- 紫色(无输出空间):网络存储空间已满
- 黄色(模拟失败):配方模拟失败
- 蓝色(持有输出):等待将输出插入网络
- 概览模式:在单个页面上一览所有 12 个配方,无需在页面之间切换。每个配方都会显示输出物品、状态指示以及错误率/占用率(自世界加载以来),以帮助识别瓶颈或资源短缺。
- 假玩家合成:兼容需要玩家上下文进行合成的模组。
使用方法:
- 1. 放置 AutoCrafter 方块并右键点击以打开 GUI
- 将合成图案插入图案槽
- 配方预览将显示所需的输入和输出
- 将所需的可重复使用/复制物品添加到 9 格内部库存中
- 通过「批量」按钮配置批次量(每个周期合成多少)
- 通过「速度」按钮配置速度(基础合成间隔)
- 通过点击状态指示器来切换条目的开/关
- 使用页面导航或「概览」按钮在配方之间切换
- 添加驱动器以存放输入/输出物品
- 添加接口以与你的主 AE2 网络交互,就像操作普通合成台一样
提示:
- 使用较大的批次量以避免过于频繁地查询网络。
- 概览模式让你可以快速检查所有 12 个配方的状态
- 在速度 GUI 中对 +/- 按钮进行 Shift+点击,每次增加 10 倍
 网络高级组件定位器
一种用于查找和导航至 AE2 网络中特定组件的高级工具:
- 组件网格:在可滚动的网格中显示网络上所有类型的组件(类似于 AE2 的网络工具)
- 位置浏览器:点击任何组件类型,即可查看按距你距离排序的所有位置
- 视觉叠加层:使用游戏内的线框轮廓和方向箭头高亮显示选定的组件位置
- 距离显示:显示到每个组件位置的距离,并自动转换单位(米/公里)
- 多选:选择多个位置以同时高亮显示它们
- 子网扫描:切换是否在扫描中包含来自连接子网的组件
- 紧凑/高视图:在紧凑的 4 行视图或能容纳更多物品的较高视图之间切换
使用方法:
- 右键点击任何网络组件以扫描网络并打开组件网格 GUI
- 右键点击空气以重新打开带有上次扫描结果的 GUI
- Shift+右键点击以切换叠加层显示
GUI 导航:
- 1. 网格视图显示所有组件类型及其数量(类似于 AE2 的网络状态)
- 点击组件类型进入详细信息视图,查看所有位置
- 点击位置以选择/取消选择它们(选定的位置会显示游戏内叠加层)
- 使用“全选”/“清除全部”按钮快速管理选择
- 使用 GUI 左侧的样式按钮在紧凑视图和高视图之间切换
- 使用 GUI 左侧的子网按钮切换子网扫描的开/关
- 点击后退箭头或按 Escape 键返回网格视图
提示:
- 超过可配置的距离后,叠加层会显示指向选定位置的方向箭头,帮助你导航
- 位置会自动按距离排序,因此最近的位置会排在前面
- 当需要在多个连接的网络中查找组件时,请使用子网扫描
- 如果不需要,请关闭叠加层以减少屏幕杂乱,特别是如果你可能需要长时间手持它的时候

 存储量发射器与显示器
Level Emitter(量级发射器)和 Storage Monitor(存储监视器)的完整方块/部分变体,支持配置轮询类型以及物品/流体/气体/essentia(精华液)。
- 轮询间隔:设置检查网络中数量的频率(从 1 秒到数天不等)。这通过避免持续检查和更新来保持进程高效,同时仍能提供及时的信息。
- 多种资源:你可以在单个方块中设置多达 24 种资源,它们将决定状态。使用 AND/OR 逻辑,你可以创建复杂的条件,以根据多种资源水平触发红石信号。例如,你可以设置为当“铁锭 <= 100 或 红石粉 > 50”时发出信号,或者当“水 > 500 且 桶 > 500”时发出信号。
- 彩色边角:Storage Display(存储显示器)方块拥有彩色边角,直观地指示匹配逻辑的状态,让你一目了然地了解条件是否满足。
远程存储监视器
一种饰品/手持物品,可在屏幕上作为叠加层显示配置内容在网络中的数量变化,覆盖设定的时间段。
- 可配置内容:设置要监控的网络中的任意物品/流体/气体/essentia
- 可配置时间窗口:选择跟踪数量变化的时间段(例如:过去 5 分钟)
- 实时叠加层:在屏幕上查看数量变化的叠加层,每次时间窗口结束时更新。这意味着一个 5 分钟的时间窗口将每 5 分钟更新一次,显示过去 5 分钟内的数量变化。
- 减少屏幕杂乱:仅显示在最近时间窗口内发生变化的资源,因此你可以轻松追踪活跃资源,而不会被存储监视器 GUI 的全部 81 个槽位所淹没。
用法:
- 通过在空气中右键单击它来配置监视器,并选择要跟踪的内容和时间窗口
- 在主手/副手中持有监视器或在饰品栏中使用,即可在屏幕上看到叠加层
- 一旦不再需要它,你可以简单地将其放入背包或箱子中,叠加层将会消失
量级监视器警报
一个监测连接的 AE2 网络中内容的方块,当任何被监控内容的水平低于指定阈值时,向任何已注册的玩家(在 GUI 中注册)发出警报。只要你的任何监控警报处于活动状态,你就会收到带有位置详情的警告叠加层。你还可以使用 Level Monitor Alarm Locator(量级监视器警报定位器)获得指向活动警报位置的视觉叠加层。整个系统的工作方式与 Storage Level Emitter(存储量发射器)非常相似,但提供直接的用户反馈而非红石输出。你可以通过 Memory Card(记忆卡)从任何 Better Level Maintainer、AE2 AutoCrafter、Storage Level Emitter 或 Storage Display 导入过滤器。如果这样做,我建议将阈值设置为源方块中目标数量的一小部分,以避免当水平在阈值附近波动时不断收到警报。
注意:此方块旨在作为自动化系统的保险网。通常建议将其与 Better Level Maintainer、AutoCrafter 或任何被动设置配对,以便在出现故障或无法满足需求时向你发出警告。对于监控工具,请优先使用 Storage Level Emitter / Storage Display 或 Remote Storage Monitor。只要内容水平未回到阈值以上,警告叠加层就 WILL NOT DISAPPEAR(不会消失)!
纹理:
- Priority Tuner(优先级调节器)、Network Health Scanner(网络健康扫描仪):SangreBK
- Storage Level Emitter 方块、Storage Display 方块:NerdySpider
Features
Network Health Scanner
A diagnostic tool for detecting network issues:
- Loop Detection: Scans your AE2 network to find cable loops that may cause network instability. Do note that loops are not necessarily a problem, as AE2 can handle them just fine, but they can cause issues in some specific cases. Loops are only relevant if all other potential issues have been ruled out.
- Non-Chunkloaded Chunks Detection: Identifies network components in non-chunkloaded chunks. Cables and wireless connectors in unloaded chunks should also be detected (as long as they are connected to a loaded chunk), but unloaded Quantum Bridges cannot be detected, due to only being registered when the chunk is loaded. Detecting them would involve scanning every unloaded chunk in the world.
- Channel Chokepoints: Finds locations where channel demand exceeds cable capacity, with per-direction flow breakdown. Due to slight differences in how AE2 calculates channel flow, the exact chokepoints may differ from what cables actually see, but it should still give you a good idea of where the bottlenecks are.
- Missing Channels: Lists devices that require a channel but couldn't get one. This category usually pairs with the chokepoints, as they point to the exact places where the channels are missing. Providing enough channels to the chokepoints should make these issues disappear.
- Pattern issues: Detect issues with patterns in the network, such as :
- Duplicate outputs: Multiple patterns producing the same item, which will cause conflicts. One of the patterns will be chosen at random by AE2, which can lead to unpredictable crafting behavior.
- Broken patterns: Crafting patterns whose recipe is not valid anymore, usually due to a mod update/removal. These patterns will be ignored by the crafting system, which can lead to crafting failures if they were used in any active recipes.
- Nested patterns: Patterns that require the output as an input. These patterns will fail to craft, as AE2 cannot handle this kind of recipe. Note that this cannot detect a loop of patterns, only direct self-dependencies in a pattern, as detecting loops of patterns would require simulating the crafting of each pattern, which is very expensive performance-wise.
- Fatal Errors: Detects critical issues that may cause the network to work in a degraded state or not work at all. As these issues are unusual, they are aggregated instead of having their own categories. This currently includes:
- Main Network connected to itself via Subnet: This creates a loop that causes ghost items, desync, and general instability.
- Multiple Storage Buses on the same block: This causes double counting (ghost items), resulting in desync and instability.
- AE2 Multiblock on chunk boundary: The multiblock (Quantum Bridge, CPU cluster) may break on chunk load.
- Visual Overlay: Shows directional arrows pointing to problem locations.
- Interactive GUI: Browse and select detected issues, organized by dimension.
- Subnet Scanning: Toggle whether to include components from connected subnets in the scan.
Usage:
- Right-click on any network component to start a scan
- Right-click in air to open the results GUI
- Shift-right-click to toggle the overlay display
Priority Tuner
A tool for quickly setting and applying storage priorities:
- Set Priority: Shift-right-click in air to open a GUI and set the stored priority value
- Apply Priority: Right-click on any AE2 block to apply the stored priority
- Auto-Apply: When held in off-hand, automatically applies stored priority when placing AE2 blocks
Usage:
- Shift-right-click in air to open the Priority GUI and set a stored value
- Right-click on AE2 blocks (ME Drives, ME Chests, Buses, etc.) to apply the stored priority
- Hold in off-hand for automatic priority application on block placement
Cards Distributor
A tool to distribute cards from your inventory to Molecular Assemblers on the network. Supports:
- Acceleration Cards for AE2 Molecular Assemblers
Better Level Maintainer
A block that automatically maintains item quantities in your AE2 network by scheduling crafting jobs.
Features:
- Multiple Recipes: Manage an unlimited(-ish) number of things to maintain (supports items, fluids, and gases).
- Target Quantities: Set the desired quantity for each item (shift-scroll the entry to double/halve quantity quickly).
- Batch Crafting: Configure how many items to craft per run. The maintainer WILL NOT ask less than the batch size, so do not set it too high, or you may end up with no request at all if the network can't reach the required amount of input resources.
- Customizable Frequency: Set check intervals from seconds to days (ctrl-scroll the entry to double/halve the time quickly).
- CPU Management: Automatically queues tasks when no CPU is available, up to a certain limit (configurable). Any tasks that exceed this limit will be marked as "error" until a CPU is available again. This prevents the maintainer from scheduling an unmanageable amount of tasks when the network is under heavy load or can't keep up with the demand.
- Status Indicators: Visual color coding shows the state of each recipe:
- Gray: Recipe is disabled (click the item name or right-click the entry to enable/disable)
- No color: Idle, waiting for next check
- Light Blue: Scheduled to run
- Green: Currently crafting
- Yellow: Stalled (waiting for resources)
- Red: Error (no recipe, no CPU, missing resources)
- Purple: Post-crafting error (no space for output)
Usage:
- 1. Place the Better Level Maintainer block and right-click to open the GUI
- Click on an empty slot to add a recipe
- In the modal, click the item slot to select a craftable item from your network
- Set the target quantity (how many items you want to maintain)
- Set the batch size (how many to craft at once)
- Set the frequency (how often to check, e.g., "1h 30m" for every 1.5 hours)
- The maintainer will automatically craft items when quantity falls below target
Tips:
- Set batch size high to avoid frequent crafting (you may even set it to several times the target quantity). Be mindful of setting it too high, as it may cause resource shortages or crafting failures if the network can't keep up.
- Use subnets to reduce the load when calculating the recipes, as the load scales with the number of items and patterns in the network.
- Try to keep the recipes simple and avoid long crafting chains, as they are exponentially more expensive to calculate and schedule.
- Prefer longer check intervals. You can batch 10k every 100 minutes instead of 100 every minute, which will be much easier on the network and still keep your stock at the desired level.
- Make sure you have enough CPUs, energy, and crafting resources to keep up with the scheduled tasks, especially if you have many recipes, long recipes, or short check intervals.
AutoCrafter
A powerful automation block that automatically crafts items using patterns from your AE2 network. Think of it as a RFTools Crafter with 12 recipe slots and a whole AE2 Network as both input and output. You can use it on-demand by using it in a subnet: interface (mainnet) -> interface (subnet) -> AutoCrafter -> insert-only storage bus (subnet) -> interface (mainnet).
Features:
- 12 Recipe Slots: Configure up to 12 different recipes.
- Pattern Support: Insert any AE2 crafting pattern to define the recipe (does not work with PROCESSING patterns, for obvious reasons). You can insert patterns from the outside by right-clicking the block with them, or from the inside by placing them in the pattern slot of each recipe entry.
- Pattern Multi-Tool support: If you have the Pattern Multi-Tool in your inventory/baubles, you can access its patterns directly from the AutoCrafter GUI. The x2/x3/+1 buttons do not work as they make no sense for CRAFTING patterns (converting the patterns into PROCESSING patterns when used).
- Recipe Preview: Visual 3x3 input grid showing required ingredients and output.
- Catalyst Inventory: Local 9-slot internal inventory per recipe for reusable/duplication items, or intermediary tools with durability (if the last recipe didn't completely consume them). AE2 is notoriously bad at handling reusable or nested items in crafting recipes, so this is a necessary workaround to be able to use them in automation.
- Performance Optimization: Caches recipe simulation on load and only recalculates it the when recipe changes. This means the expensive part (when it comes to crafting) is only done once, and then the AutoCrafter will just rely on the cached results for subsequent crafts, which is very fast.
- Batch Crafting: Configure how many items to craft per operation, while decreasing the crafting speed accordingly. A batch size of 50x means 50x the inputs, for 50x the output, but will run 1/50th of the speed. It will still consume the same amount of resources per second, just in bigger, slower bursts. This is ideal for performance, as the importing/exporting of resource will run less frequently, while keeping the same overall throughput. A Crafter Speed Upgrade card (tier I/II/III/IV) can be used to increase this batch size even further, without speed penalty (the batch size is increased instead of the speed to avoid spamming the network, which causes lag). The base batch per operation can be set in config.
- Speed Control: Set crafting interval from 1 second to days (1s, 1m, 1h, 1d increments). NOTE: this setting explicitly slows down crafting. You may want to use "Batch size" instead, to craft more items per operation without slowing down the overall crafting speed.
- Partial Crafting: If there aren't enough resources to craft the full batch size, the crafter will automatically scale down the batch size to craft as many items as possible with the available resources, instead of just waiting for a full batch worth of resources to be available. You can see precise statistics about the error rate (see States Indicators) and occupancy (how much the recipe had to be scaled down) of each recipe in the Overview page, to help identify bottlenecks or resource shortages. The efficiency% of a recipe can be calculated as (1 - error rate%) * occupancy%, so a recipe with 50% error rate and 50% occupancy would have an overall efficiency of 25%, while a recipe with 0% error rate and 50% occupancy would have an overall efficiency of 50%.
- Network Integration: Automatically extracts inputs from ME storage and inserts outputs back. There is no external inventory, the whole network is the inventory. Just make sure to have enough drives/interfaces/storage buses to hold the required items, and the AutoCrafter will take care of the rest.
- State Indicators: Color-coded status for each recipe entry:
- Gray (Disabled): Recipe is disabled
- No color (Idle): Waiting for next craft cycle
- Orange (Missing Catalyst): Required catalyst items (insert manually in the internal inventory)
- Red (Missing Input): Required ingredients not available in network (couldn't even make a single item)
- Purple (No Output Space): Network storage full
- Yellow (Simulation Failed): Recipe simulation failed
- Blue (Holding Output): Waiting to insert output into network
- Overview Mode: See all 12 recipes at a glance on a single page, without having to switch between pages. The output item, state indicator, and error rate/occupancy (since world load) are shown for each recipe, to help identify bottlenecks or resource shortages.
- Fake Player Crafting: Compatible with mods that require player context for crafting.
Usage:
- 1. Place the AutoCrafter block and right-click to open the GUI
- Insert a crafting pattern into the pattern slot
- The recipe preview will show required inputs and output
- Add the required reusable/duplication items to the 9-slot internal inventory
- Configure batch size (how many to craft per cycle) via the Batch button
- Configure speed (base crafting interval) via the Speed button
- Toggle entries on/off by clicking the state indicator
- Use page navigation or Overview button to switch between recipes
- Add drives to hold the input/output items
- Add interfaces to interact with your main AE2 network, like you would do a normal crafter
Tips:
- Use larger batch size to avoid querying the network too often.
- The Overview mode lets you quickly check the status of all 12 recipes
- Shift-click on +/- buttons in Speed GUI for 10x increments
Network Advanced Component Locator
An advanced tool for finding and navigating to specific components in your AE2 network:
- Component Grid: Displays all component types on your network in a scrollable grid (similar to AE2's Network Tool)
- Location Browser: Click any component type to see all its locations sorted by distance from you
- Visual Overlay: Highlights selected component locations with in-world wireframe outlines and directional arrows
- Distance Display: Shows distance to each component location, with automatic unit conversion (m/km)
- Multi-Selection: Select multiple locations to highlight them simultaneously
- Subnet Scanning: Toggle whether to include components from connected subnets in the scan
- Compact/Tall View: Switch between a compact 4-row view or a taller view that fits more items on screen
Usage:
- Right-click on any network component to scan the network and open the component grid GUI
- Right-click in air to reopen the GUI with the last scan results
- Shift-right-click to toggle the overlay display
GUI Navigation:
- 1. The grid view shows all component types with their count (like AE2's Network Status)
- Click a component type to enter detail view and see all locations
- Click locations to select/deselect them (selected locations show overlays in-world)
- Use "Select All" / "Clear All" buttons to manage selections quickly
- Use the style button (left of GUI) to toggle between compact and tall view
- Use the subnet button (left of GUI) to toggle subnet scanning on/off
- Click the back arrow or press Escape to return to the grid view
Tips:
- Past a configurable distance, the overlay shows directional arrows pointing toward selected locations, helping you navigate
- Locations are automatically sorted by distance, so the closest ones appear first
- Use subnet scanning when you need to find components across multiple connected networks
- Toggle overlay off when not needed to reduce screen clutter, if you may hold it in hand for prolonged periods of time
Storage Level Emitter & Display
A full-block/part variant of the Level Emitter and Storage Monitor, with a configured polling type and item/fluid/gas/essentia support.
- Polling Interval: Set how often to check the quantity in the network (from 1 second to days). This keeps the process efficient by avoiding constant checks and updates, while still providing timely information.
- Multiple resources: You can set up to 24 resources in a single block, which will decide on the state. Using the AND/OR logic, you can create complex conditions to trigger redstone signals based on multiple resource levels. For example, you could set it to emit a signal if "Iron Ingots <= 100 OR Redstone > 50", or "Water > 500 AND Buckets > 500".
- Colored corners: The Storage Display block has colored corners that visually indicate the state of the matching logic, telling you at a glance if the conditions are met or not.
Remote Storage Monitor
A bauble/held item that shows the quantity variation of configured content in the network as an overlay on the screen, over a set period of time.
- Configurable Content: Set any item/fluid/gas/essentia to monitor from your network
- Configurable Time Window: Choose the time period over which to track quantity changes (e.g., last 5 minutes)
- Real-Time Overlay: See the quantity variation as an overlay on your screen, updating every time the time window elapses. This means a 5-minute window will update every 5 minutes, showing the change in quantity over the last 5 minutes.
- Reduced Screen Clutter: Only the resources that changed within the last time window are shown, so you can easily track active resources without being overwhelmed by the full 81 slots of the Storage Monitor GUI.
Usage:
- Configure the monitor by right-clicking it in air, and selecting the content to track and the time window
- Hold the monitor in your main/off-hand or baubles to see the overlay on screen
- Once you do not need it anymore, you can simply put it in your inventory or a chest, and the overlay will disappear
Level Monitor Alarm
A block that monitors contents in the attached AE2 network and alerts any registered player (register in the GUI) when the level of any monitored content falls below a specified threshold. You will get a warning overlay for as long as any of your monitored alarms are active, with location details. You can also use the Level Monitor Alarm Locator to get a visual overlay pointing to the location of the active alarms. The overall system works very similarly to the Storage Level Emitter, but with direct user feedback instead of redstone output. You can import filters from any Better Level Maintainer, AE2 AutoCrafter, Storage Level Emitter, or Storage Display via Memory Card. If you do, I would recommend setting the threshold to a fraction of the target quantity in the source block, to avoid getting constant alarms when the level fluctuates around the threshold.
NOTE: This block is intended as a safety net for automation systems. It is usually recommended to pair it with a Better Level Maintainer, an AutoCrafter, or any passive setup, to warn you when something broke or cannot keep up with the demand. For a monitoring tool, prefer the Storage Level Emitter/Storage Display or the Remote Storage Monitor. The warning overlay WILL NOT DISAPPEAR until the content levels are back above the threshold!
Textures:
- Priority Tuner, Network Health Scanner: SangreBK
- Storage Level Emitter block, Storage Display block: NerdySpider


 模组

 模组
 模组

 模组
 模组
 模组
评论 0
登录后参与评分
还没有评论,来抢沙发吧