注意:由于在 1.8 版本中 Optifine 与光影模组合并,1.10.2 版本不兼容 Optifine。
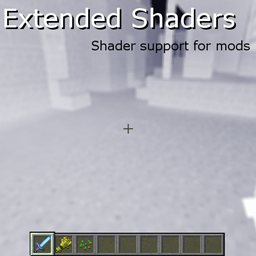
Extended Shaders
面向模组的着色器 API!
Extended Shaders 是一个核心模组(coremod)API,允许 Forge 模组使用着色器,而无需进行核心模组开发,同时仍能与其他通过此 API 使用着色器的模组兼容。
它允许模组添加着色器和后处理效果!
如果您不了解 GLSL(包括 GLSL 兼容性配置文件),则无法使用此 API,因为您将直接使用它们。
此模组兼容 Optifine。但是,只有在关闭“快速渲染”(fast render)时,后处理功能才能正常工作。
如果已安装 Optifine,您可以在着色包菜单中选择“Extended Shaders”来启用着色器。否则,您可以在“视频设置”菜单中开启或关闭着色器。
此模组要求您的 PC 支持帧缓冲、帧缓冲 Blitting 和浮点纹理。如果不支持,将会导致崩溃。这是有意为之的。
来自 GitHub 的说明文档,供模组开发者阅读:
适用于 Minecraft 1.12.2 的 Extended Shaders 模组。
本 API 及其包含的核心模组 Extended Shaders 旨在让模组能够在不学习如何制作核心模组、且不牺牲与其他使用此光影系统的模组兼容性的前提下,在 Minecraft 内部使用着色器和后处理器。
其设计允许多个模组以 GLSL 本身未提供的方式“附加”着色器统一变量(uniforms)、变量、常量和代码,且彼此不会发生冲突。
本 API 并不打算供对 GLSL 缺乏良好理解的人使用。
使用方法:
你需要将 API 类添加到你的项目中,并保留包名。
如何制作着色器:
制作顶点着色器:
1. 在你的模组资产中创建一个文件,其中包含统一变量、变量和常量的列表,如下所示:
uniform float burnAmount; // 统一变量
varying vec4 fragCol; // 变量
#define col vec3(.976, .969, .816) // 常量
2. 在你的模组资产中创建一个文件,其中包含着色器的代码,如下所示:
fragCol = fragCol * col;
3. 创建一个新的 ShaderData 实例,如下所示:
vertShader = new ShaderData(new ResourceLocation(modid, uniformslocation), new ResourceLocation(modid, codelocation), uniform name 1, uniform name 2, ...);
4. 要启用它,请执行以下操作:
ShaderRegistry.addVertexShader(vertShader);
5. 要禁用它,请执行以下操作:
ShaderRegistry.removeVertexShader(vertShader);
制作片段着色器:
1. 在你的模组资产中创建一个文件,其中包含统一变量、变量和常量的列表,如下所示:
uniform float burnAmount; // 统一变量
varying vec2 textureCoords; // 变量
#define col vec3(.976, .969, .816) // 常量
2. 在你的模组资产中创建一个文件,其中包含后处理器的代码。你可以通过修改 gl_fragData[0] 来工作,或者如果你愿意也可以直接设置它,如下所示:
float depth = sqrt(eyePos.x * eyePos.x + eyePos.y * eyePos.y + eyePos.z * eyePos.z);
if (depth > 64.0) discard;
depth = clamp(depth / 64.0, 0, 1);
float val = (max(max(gl_FragData[0].r, gl_FragData[0].g), gl_FragData[0].b) + min(min(gl_FragData[0].r, gl_FragData[0].g), gl_FragData[0].b)) * .25;
gl_FragData[0] = vec4(vec3(1.0) - col * (depth + val - depth * val), gl_FragData[0].a);
3. 创建一个新的 ShaderData 实例,如下所示:
fragShader = new ShaderData(new ResourceLocation(modid, uniformslocation), new ResourceLocation(modid, codelocation), uniform name 1, uniform name 2, ...);
4. 要启用它,请执行以下操作:
ShaderRegistry.addFragmentShader(fragShader);
5. 要禁用它,请执行以下操作:
ShaderRegistry.removeFragmentShader(fragShader);
提供的统一变量/变量:
请检查 src\main\resources\assets\extendedshaders\shaders\shader_uniform.txt
如何制作后处理器:
1. 在你的模组资产中创建一个文件,其中包含后处理器的统一变量和常量的列表,如下所示:
uniform float currentTime; // 统一变量
#define rad 3.0 // 常量
2. 在你的模组资产中创建一个文件,其中包含后处理器的代码,如下所示:
float tx1 = rad * dx;
float tx2 = tx1 * .5;
float ty = rad * .5 * sqrt(3.0) * dy;
vec3 cp1 = texture2D(tex0, texCoords).rgb;
vec3 cp1 = texture2D(tex0, texCoords + vec2(tx1, 0)).rgb;
vec3 cp3 = texture2D(tex0, texCoords + vec2(tx2, ty)).rgb;
vec3 cp4 = texture2D(tex0, texCoords + vec2(-tx2, ty)).rgb;
vec3 cp5 = texture2D(tex0, texCoords + vec2(-tx1, 0)).rgb;
vec3 cp6 = texture2D(tex0, texCoords + vec2(-tx2, -ty)).rgb;
vec3 cp7 = texture2D(tex0, texCoords + vec2(tx2, -ty)).rgb;
gl_FragData[0] = vec4((cp1 + cp2 + cp3 + cp4 + cp5 + cp6 + cp7) / 7, 1);
3. 创建一个新的 PostProcessor 实例,如下所示
postProcessor = new PostProcessor(new ResourceLocation(modid, uniformslocation), new ResourceLocation(modid, codelocation), uniform name 1, uniform name 2, ...);
4. 要启用它,请使用以下命令:
PostProcessorRegistry.addPostProcessor(postProcessor);
5. 要禁用它,请使用以下命令:
PostProcessorRegistry.removePostProcessor(postProcessor);
提供的统一变量/变量:请检查 src\main\resources\assets\extendedshaders\shaders\post_processor_frag_uniforms.txt
该 API 还允许为着色器和后处理器设置优先级。查看 API 以了解更多关于这些高级功能的信息。
NOTE: The 1.10.2 version is NOT optifine compatible due to the optifine-shadersmod merge in 1.8
Extended Shaders
Shader API for mods!
Extended Shaders is a coremod API that allows forges mod to use shaders, without needing to mess with coremodding and still being compatible with other mods that use shaders via this API.
It allows mods to add shaders and post-processing effects!
You cannot use this API without a good understanding of GLSL, including the GLSL compatibility profile as that is what you will be using.
This mod is Optifine compatible. However, post-processing will ONLY work if "fast render" is OFF.
If Optifine is installed, you can enable shaders by selecting 'Extended Shaders' in the shaderpacks menu. Otherwise, you can turn shaders on/off in the "Video Settings" menu.
this mod REQUIRES your PC support framebuffers, framebuffer blitting, and floating-point textures. It will crash if you do not. This is purposeful.
Readme from GitHub, for modders:
Extended Shaders mod for Minecraft 1.12.2.
The purpose of this API, and it's containing coremod, Extended Shaders, is to allow mods to use shaders and post-processors inside Minecraft without needing to learn how to make a coremod, and without sacrificing compatibility with other mods using this shader system.
It is designed to allow multiple mods to "attach" shader uniforms, variables, constants, and code without conflicting with each other, in a way not provided by GLSL itself.
It is NOT intended to be used by someone without a good understanding of GLSL.
HOW TO USE:
You will need to add the API classes to your project, PRESERVING the package names.
HOW TO MAKE A SHADER:
TO MAKE A VERTEX SHADER:
1. create a file in your mod's assets, containing a list of the uniforms, variables, and constants, like this:
uniform float burnAmount; //uniform
varying vec4 fragCol; //variable
#define col vec3(.976, .969, .816) //constant
2. create a file in your mod's assets, containing the code for the shader, like this:
fragCol = fragCol * col;
3. create a new ShaderData instance, like this:
vertShader = new ShaderData(new ResourceLocation(modid, uniformslocation), new ResourceLocation(modid, codelocation), uniform name 1, uniform name 2, ...);
4. to turn it ON, do this:
ShaderRegistry.addVertexShader(vertShader);
5. to turn it OFF, do this:
ShaderRegistry.removeVertexShader(vertShader);
TO MAKE A FRAGMENT SHADER:
1. create a file in your mod's assets, containing a list of the uniforms, variables, and constants, like this:
uniform float burnAmount; //uniform
varying vec2 textureCoords; //variable
#define col vec3(.976, .969, .816) //constant
2. create a file in your mod's assets, containing the code for the shader. you will work via modifying gl_fragData[0], or setting it if you prefer, like this:
float depth = sqrt(eyePos.x * eyePos.x + eyePos.y * eyePos.y + eyePos.z * eyePos.z);
if (depth > 64.0) discard;
depth = clamp(depth / 64.0, 0, 1);
float val = (max(max(gl_FragData[0].r, gl_FragData[0].g), gl_FragData[0].b) + min(min(gl_FragData[0].r, gl_FragData[0].g), gl_FragData[0].b)) * .25;
gl_FragData[0] = vec4(vec3(1.0) - col * (depth + val - depth * val), gl_FragData[0].a);
3. create a new ShaderData instance, like this:
fragShader = new ShaderData(new ResourceLocation(modid, uniformslocation), new ResourceLocation(modid, codelocation), uniform name 1, uniform name 2, ...);
4. to turn it ON, do this:
ShaderRegistry.addFragmentShader(fragShader);
5. to turn it OFF, do this:
ShaderRegistry.removeFragmentShader(fragShader);
PROVIDED UNIFORMS/VARIABLES:
check src\main\resources\assets\extendedshaders\shaders\shader_uniform.txt
HOW TO MAKE A POST-PROCESSOR:
1. create a file in your mod's assets, containing a list of the post-processor's uniforms and constants, like this:
uniform float currentTime; //uniform
#define rad 3.0 //constant
2. create a file in your mod's assets, conatining the post-processor's code, like this:
float tx1 = rad * dx;
float tx2 = tx1 * .5;
float ty = rad * .5 * sqrt(3.0) * dy;
vec3 cp1 = texture2D(tex0, texCoords).rgb;
vec3 cp1 = texture2D(tex0, texCoords + vec2(tx1, 0)).rgb;
vec3 cp3 = texture2D(tex0, texCoords + vec2(tx2, ty)).rgb;
vec3 cp4 = texture2D(tex0, texCoords + vec2(-tx2, ty)).rgb;
vec3 cp5 = texture2D(tex0, texCoords + vec2(-tx1, 0)).rgb;
vec3 cp6 = texture2D(tex0, texCoords + vec2(-tx2, -ty)).rgb;
vec3 cp7 = texture2D(tex0, texCoords + vec2(tx2, -ty)).rgb;
gl_FragData[0] = vec4((cp1 + cp2 + cp3 + cp4 + cp5 + cp6 + cp7) / 7, 1);
3. create a new PostProcessor instance, like this
postProcessor = new PostProcessor(new ResourceLocation(modid, uniformslocation), new ResourceLocation(modid, codelocation), uniform name 1, uniform name 2, ...);
4. to turn it ON use this:
PostProcessorRegistry.addPostProcessor(postProcessor);
5. to turn it OFF use this:
PostProcessorRegistry.removePostProcessor(postProcessor);
PROVIDED UNIFORMS/VARIABLES: check src\main\resources\assets\extendedshaders\shaders\post_processor_frag_uniforms.txt
The API also allows for priorities on shaders and post-processors. Look through the API for more information on these advanced features.

 模组

 模组

 模组

 模组
 模组

 模组
评论 0
登录后参与评分
还没有评论,来抢沙发吧