Redmon
Redmon 是一款工具,可让你为红石项目创建美观且实用的游戏内调试叠加层。
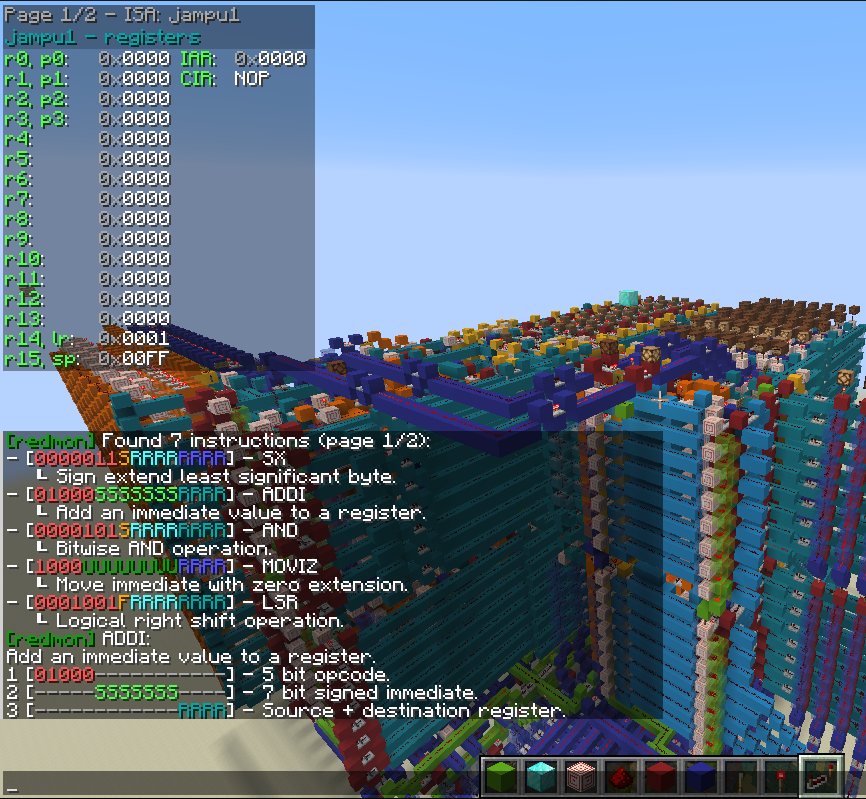
该模组旨在用于计算红石项目,但几乎可用于任何场景。目前,该模组支持以下方块:
- 中继器(开/关)
- 比较器(开/关)
- 红石火把(开/关)
- 红石粉(开/关及信号强度)
- 红石灯(开/关)
快速入门指南
快捷键
该模组提供少量专用快捷键以执行常见操作。
= - 切换模组叠加层的可见性。[ - 显示上一个配置页面。] - 显示下一个配置页面。
这些快捷键可在游戏设置中进行配置。
创建配置(Profile)
Redmon 基于“配置(profiles)”运行。在创建或查看任何信号之前,必须先创建一个配置来容纳它们。首次加载模组时,未选择任何配置(见左上角)。向你的建筑添加调试输出的第一步是为你的配置选择一个激活位置,并对其进行标记以便日后查找:
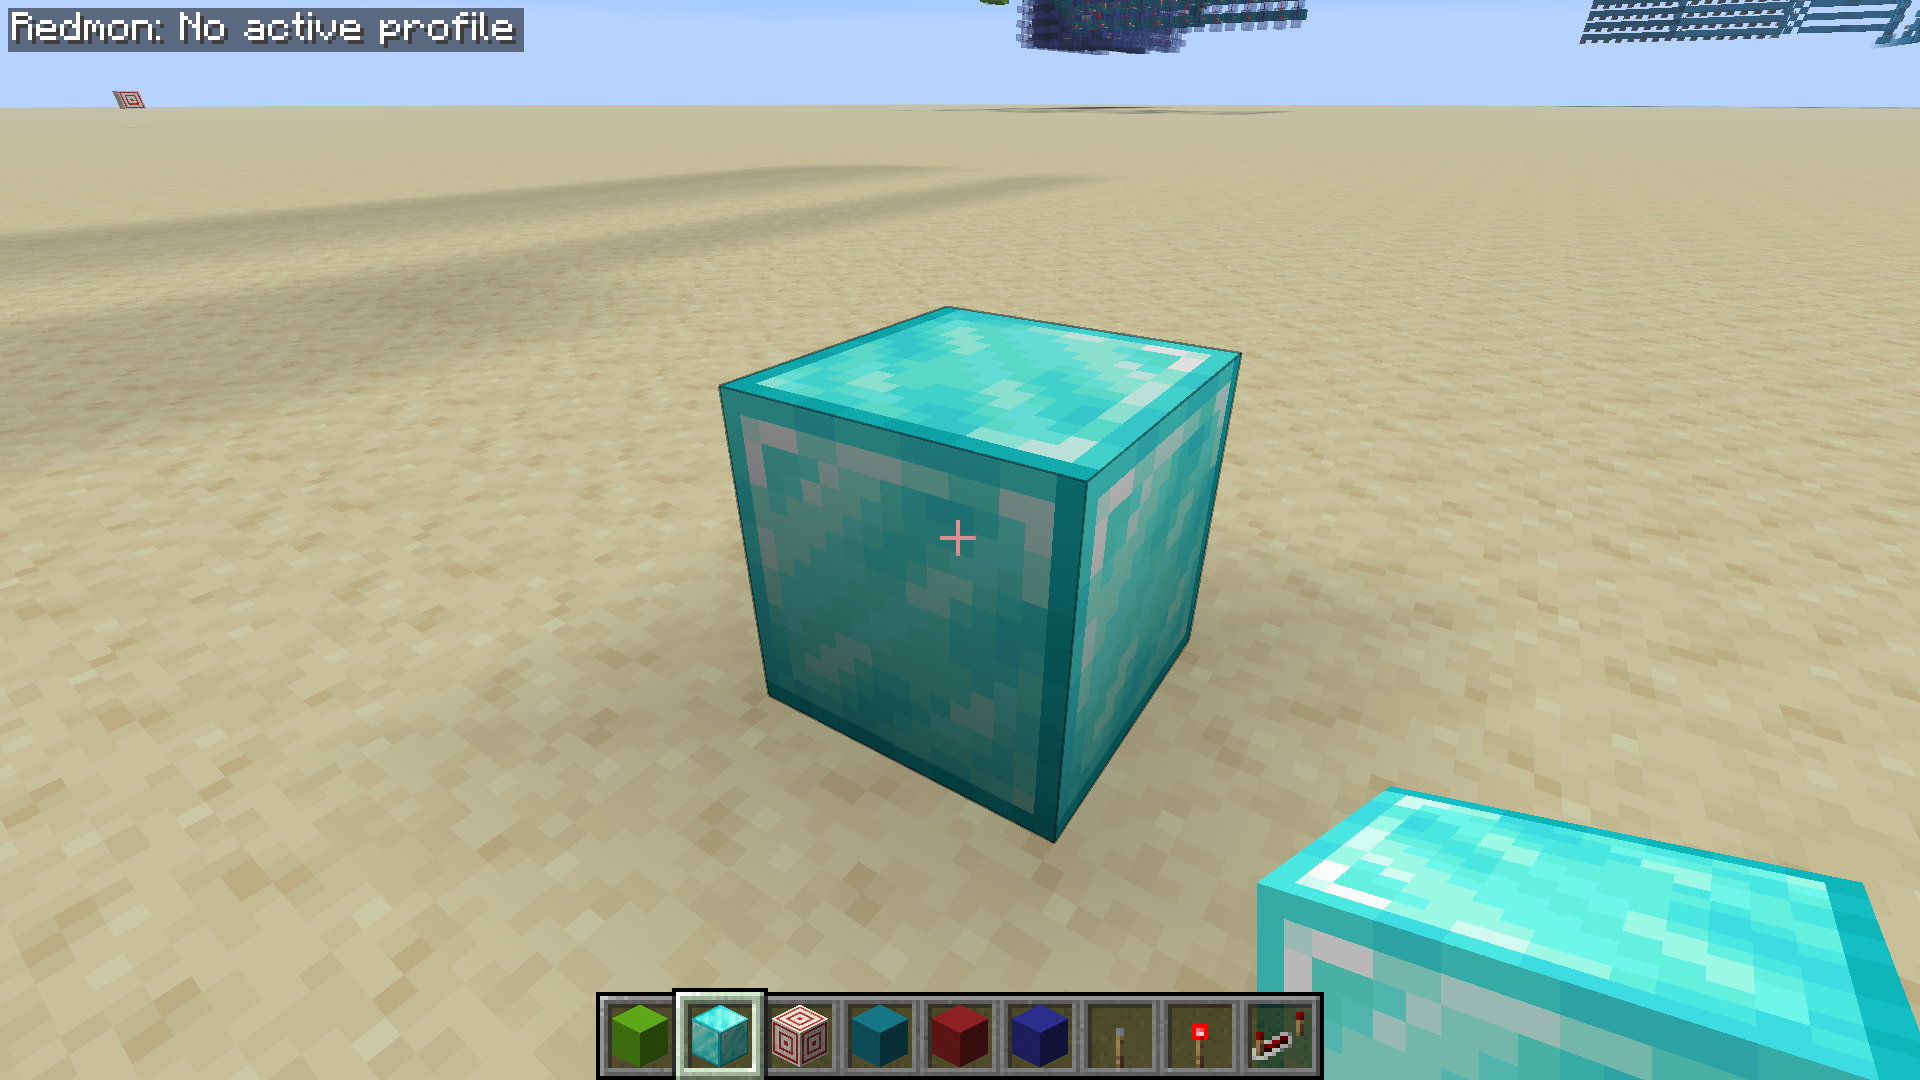
选定参考方块后,站在其上方并创建配置:
/redmon profile create <profile-name>
这将创建一个具有指定名称的空配置,并将其设置为相对于你在世界中当前位置的当前配置。运行此命令后,你应该能在屏幕左上角看到如下所示的配置:
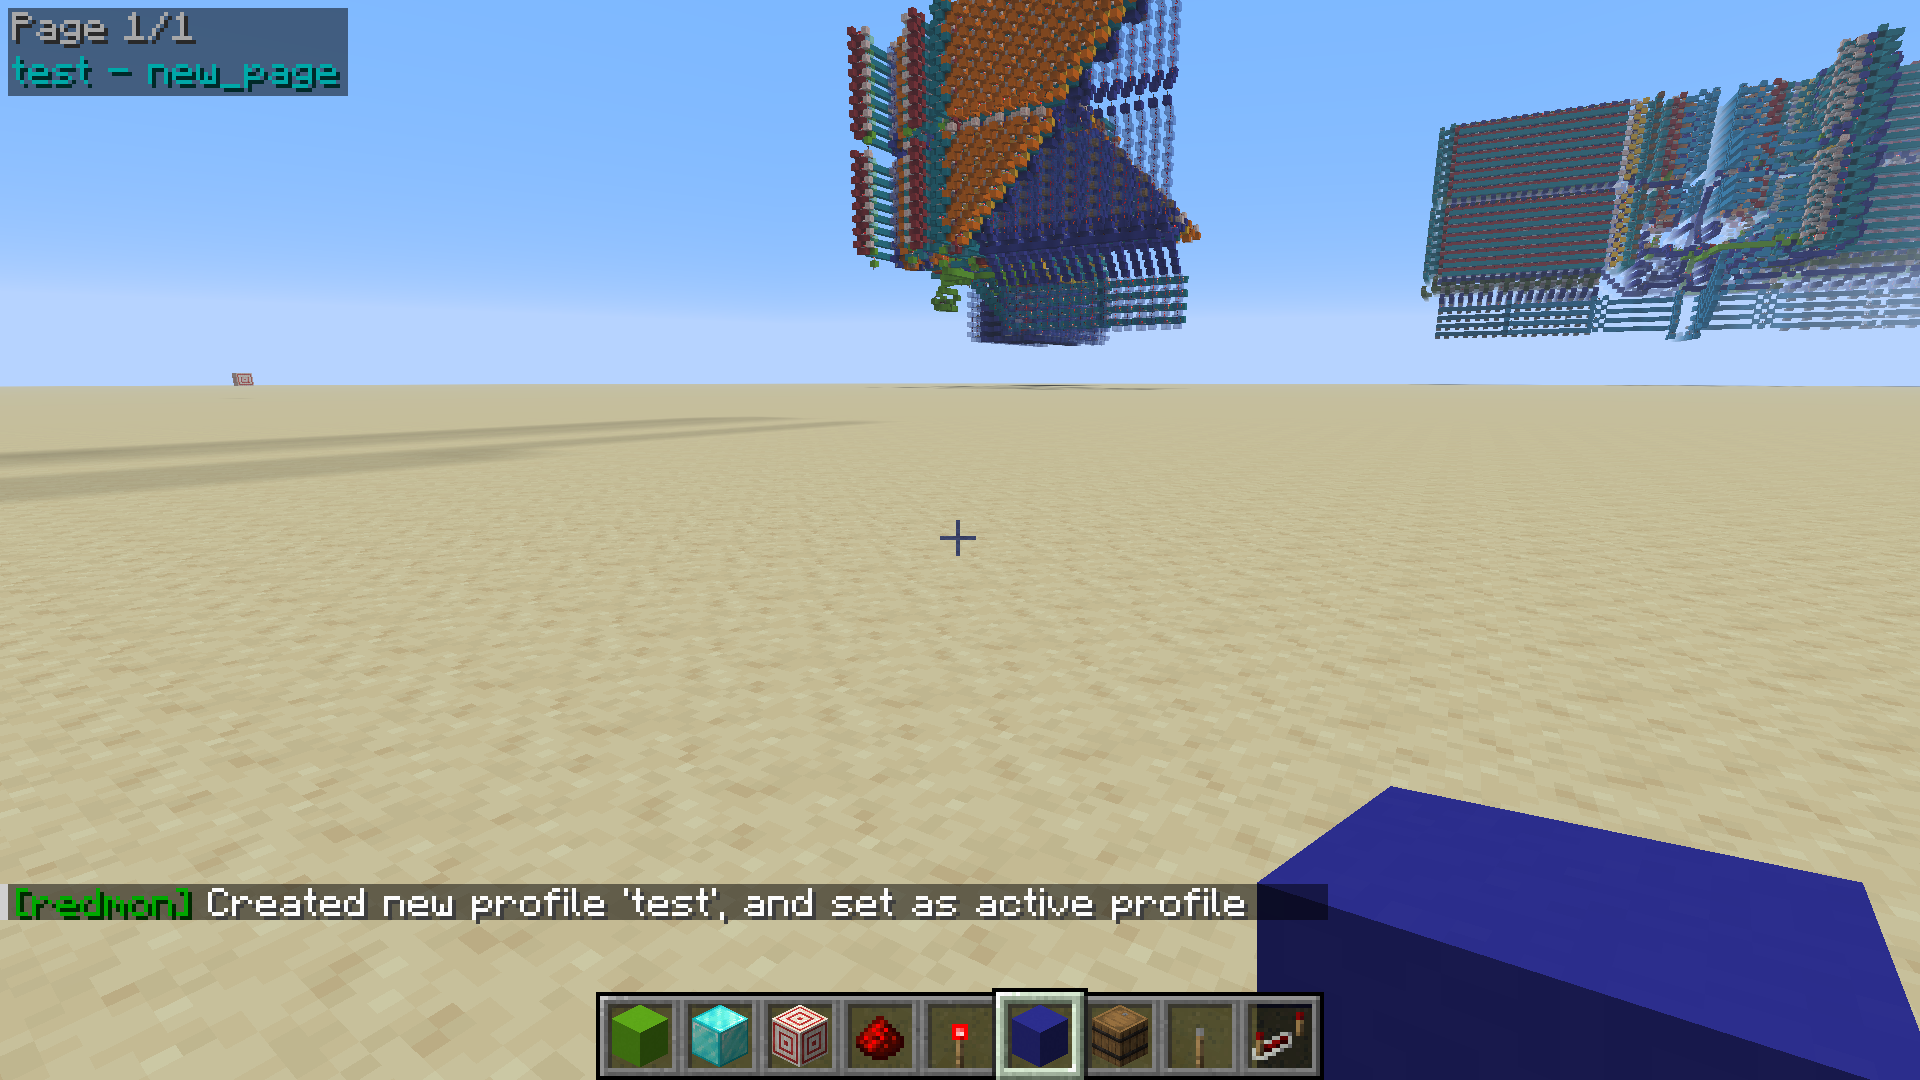
new_page - 配置所在的当前页面(默认名称)。test - 已创建配置的名称。
配置存储在磁盘路径 .minecraft/config/redmon_profiles.json 中,并在你进行修改时自动保存。你可以使用 /redmon profile list 和 /redmon profile search 命令查看已保存的配置。
可以通过以下方式选择现有配置:
/redmon profile select <profile-name>
每当选择配置时,它都会根据当前玩家位置“映射”到世界中。这使得配置可以应用于世界中的任何位置的设计。建议标记创建配置的位置,以便日后重新选择时知道站在哪里!
如果组件缺失或配置在错误的位置被选中,导致模组无法找到一个或多个方块,叠加层中将出现如下错误提示:
你还可以向配置中添加额外的页面,并使用 快捷键 进行循环切换:
/redmon page add <page-name>
最后,当你对所选配置文件的编辑完成后,可以运行 /redmon profile deselect 将界面恢复到默认状态。
添加信号
信号由你希望在覆盖层中监控的一个方块(或一组方块)组成。通过注视一个方块或导线,并运行 /redmon signal add 命令,可以将该信号添加到当前活动的配置文件中:
/redmon signal add <signal-name> <signal-type> <block-count>
目前有 5 种信号类型可供选择:
repeater - 红石中继器。torch - 红石火把。dust_binary - 红石粉(开/关)。dust_ss - 红石粉(信号强度)。comparator_binary - 红石比较器。
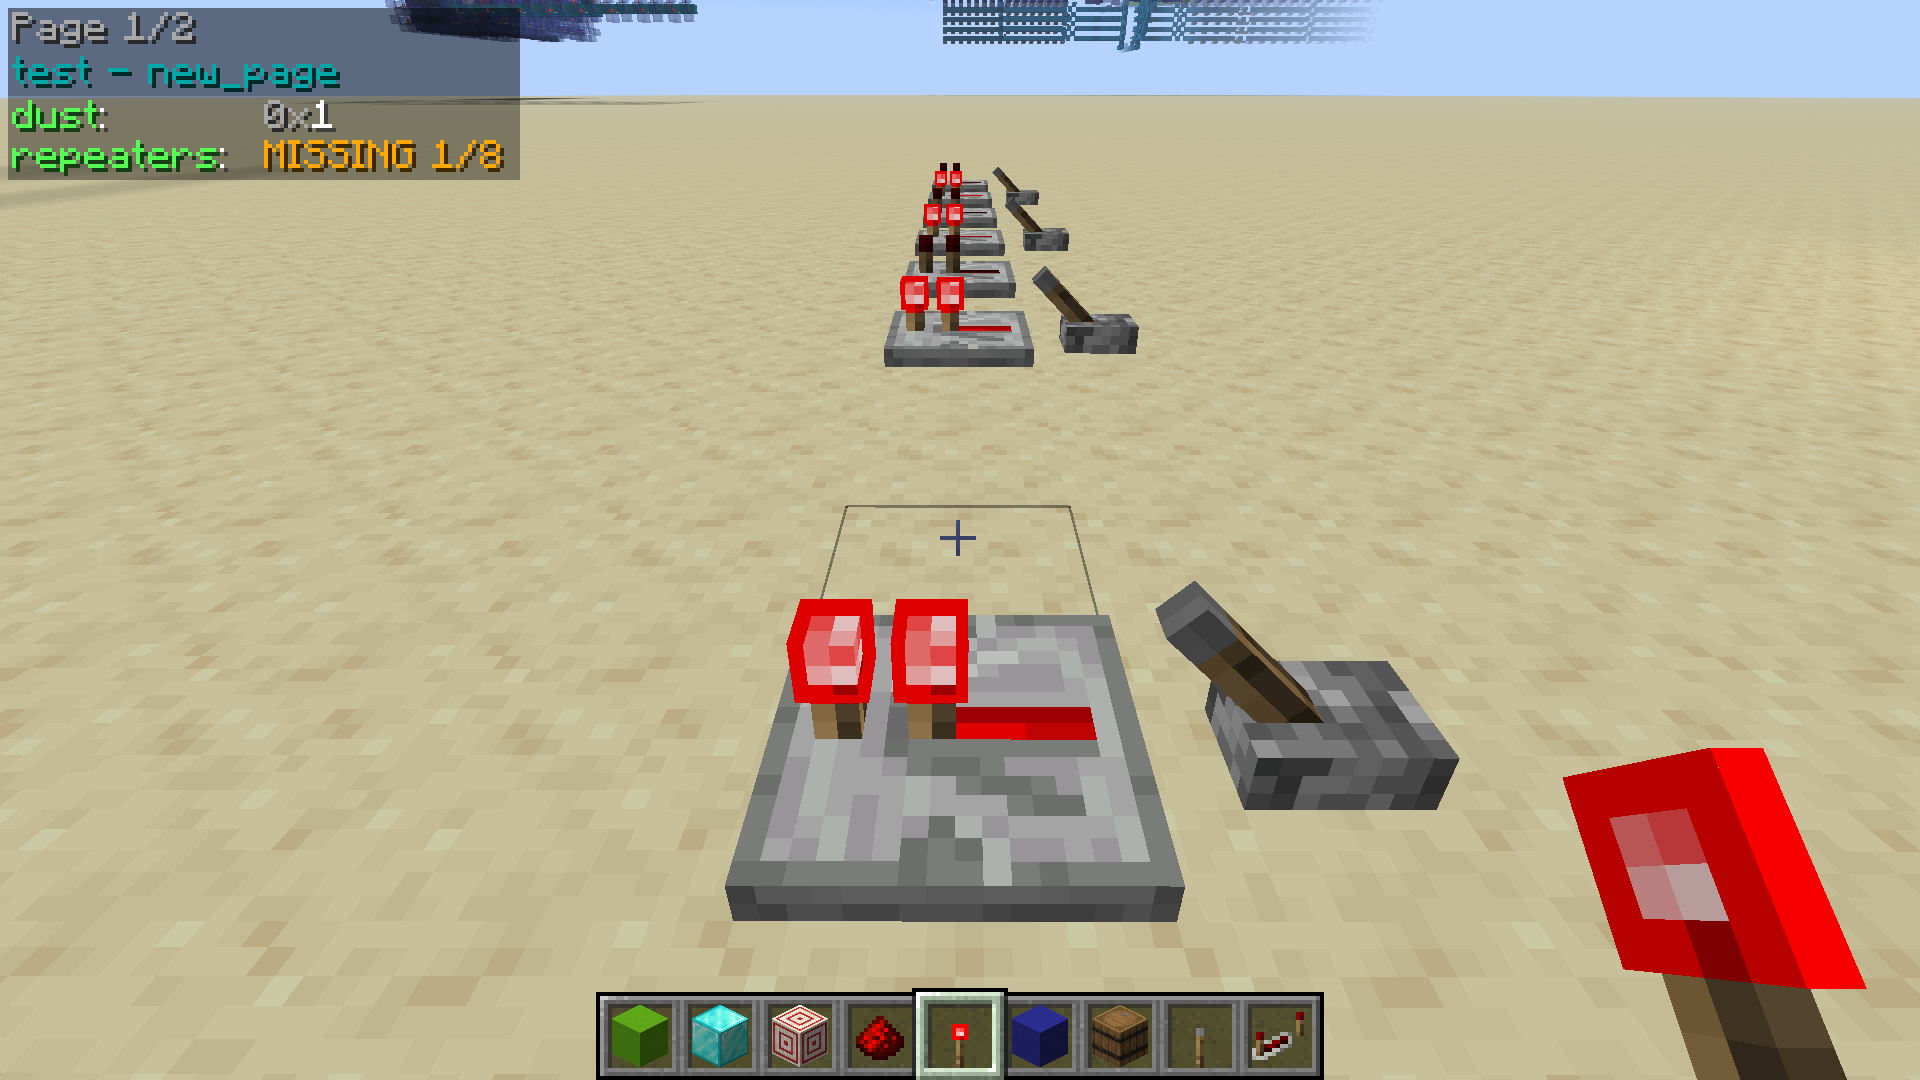
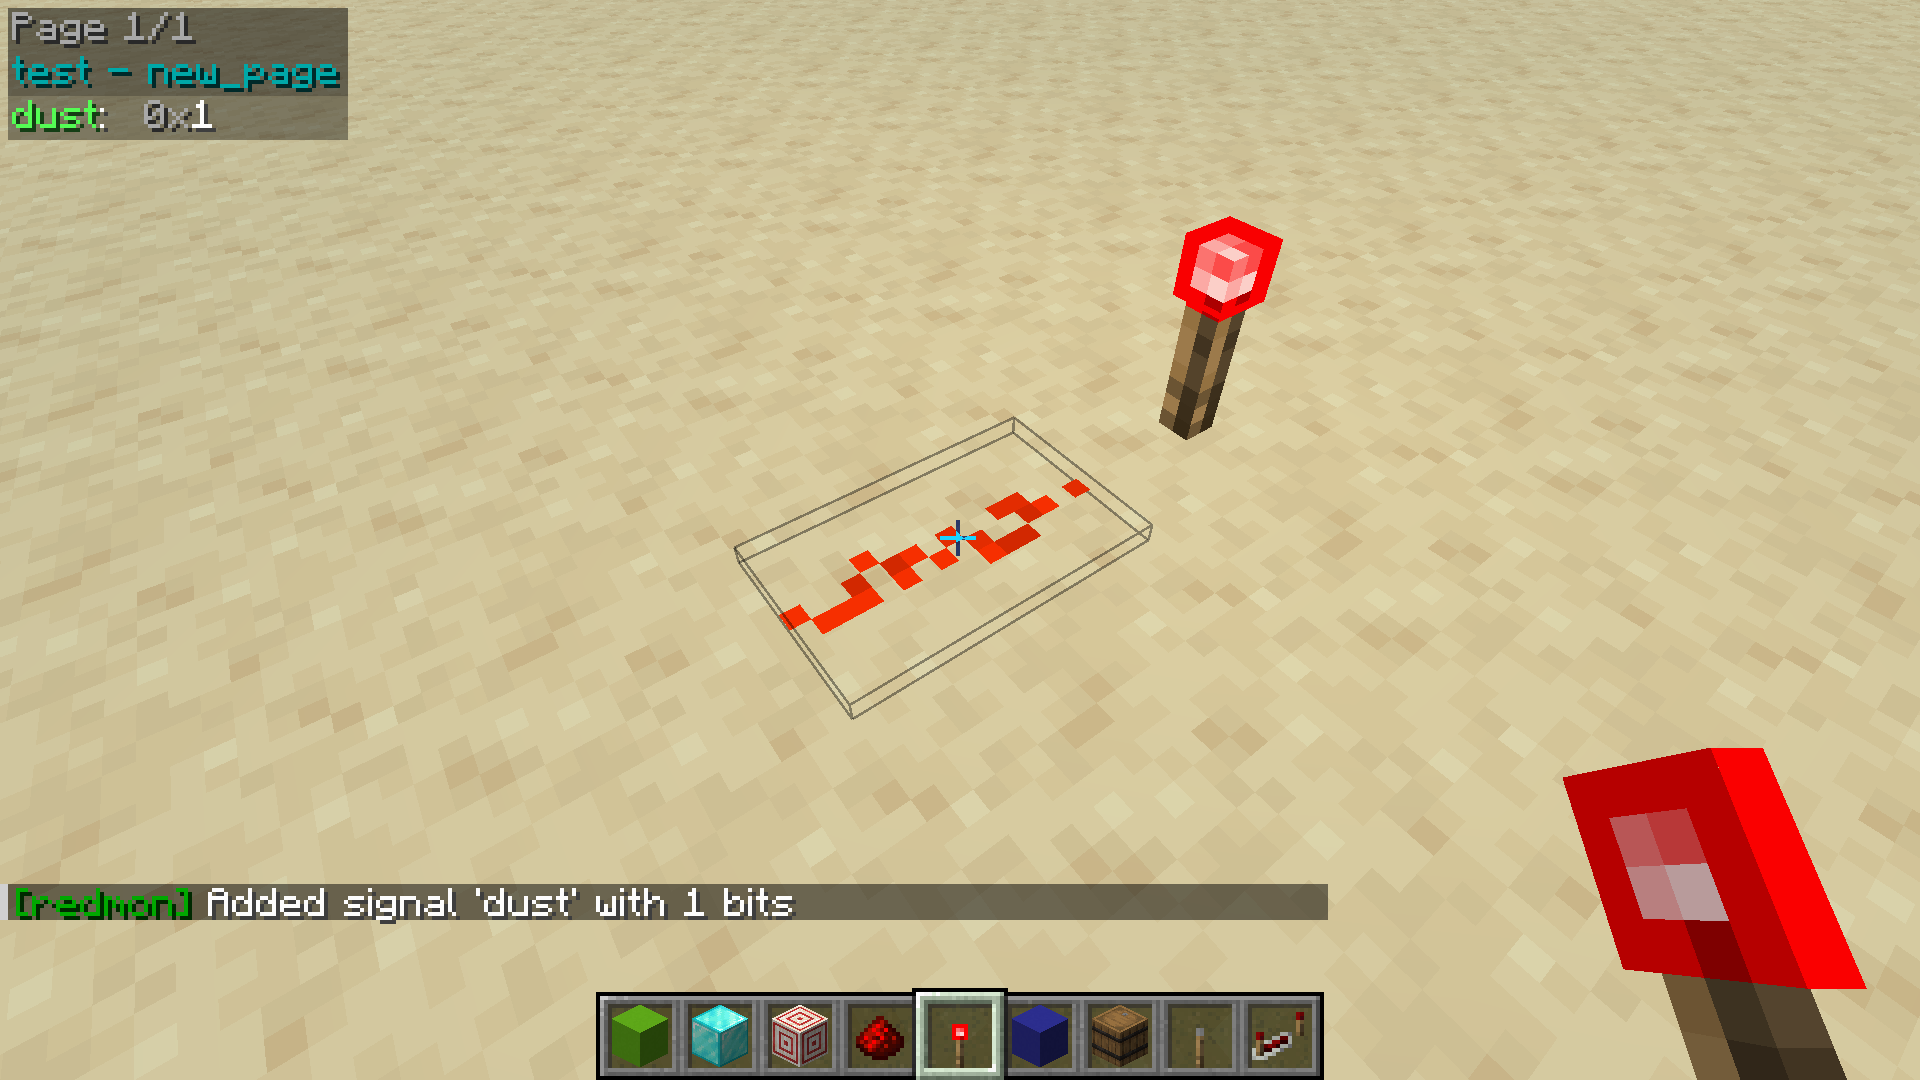
以下截图展示了在注视一段红石粉时运行命令 /redmon signal create dust dust_binary 1 的结果。此命令创建了一个名为 “dust” 的单个红石粉信号:
还可以通过单个命令添加包含多个方块的信号。这是通过将准星对准目标信号中最重要位所代表的组件,并传入大于 1 的方块数量来实现的,如下所示:
/redmon signal create repeaters repeater 8
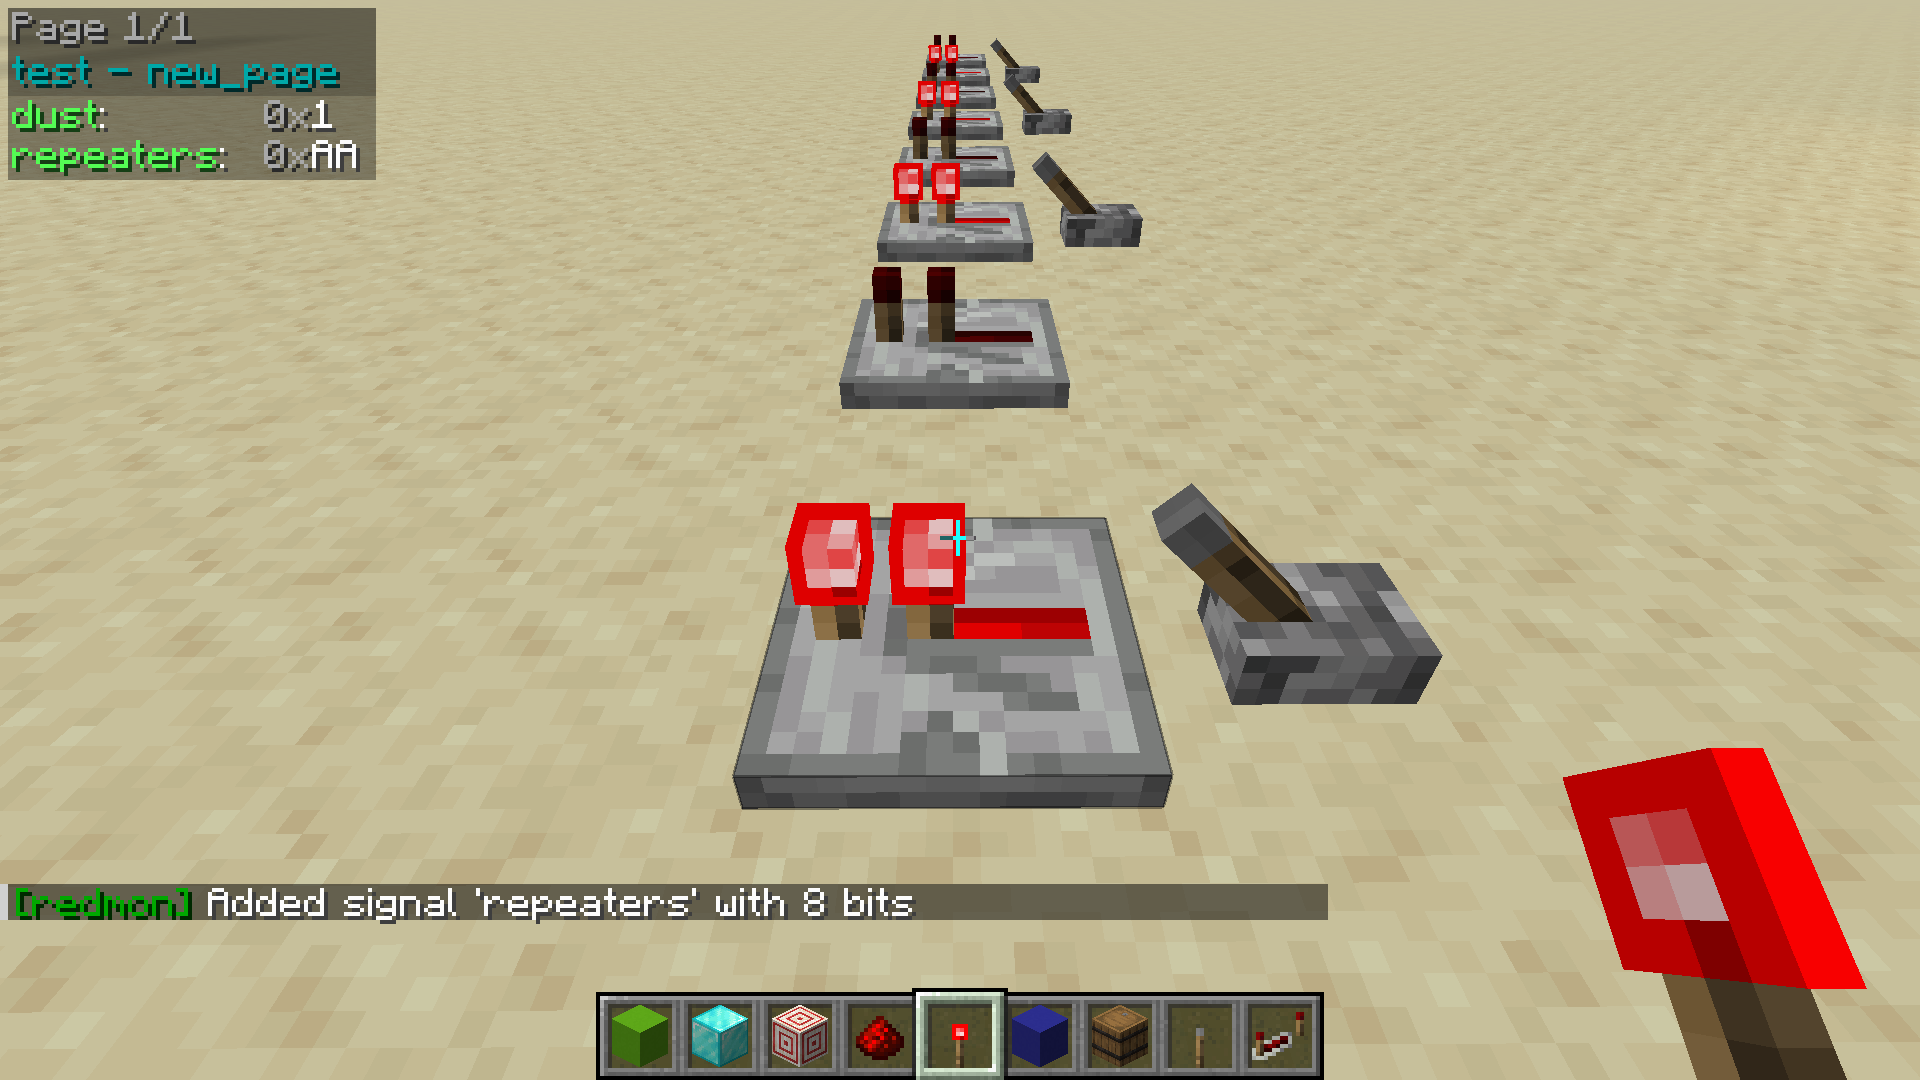
在创建这种多方块信号时,模组会沿着最接近玩家视角方向的 cardinal direction(基本方向:东、南、西、北)搜索其他匹配的方块。如果未找到请求数量的方块,控制台将显示错误信息。使用此命令时请务必面向正确的方向!
还可以使用以下命令移除、移动、重命名或重新格式化信号:
/redmon signal remove <signal-name>/redmon signal move <signal-name> (up|down) [<count>]/redmon signal move <signal-name> column <column-number>/redmon signal rename <signal-name> <new-signal-name>/redmon singal format <signal-name> <signal-format>
集成反汇编器
Redmon 包含一个集成的反汇编器,可以对覆盖层中的信号进行实时反汇编。反汇编器的工作原理是允许用户定义一套指令集,然后为选定的信号在覆盖层中打印指令的反汇编结果。该反汇编器还充当指令集的内置游戏内文档。
- 创建指令集。
- 向指令集中添加指令布局。
- 将指令集分配给当前活动配置文件的页面。
创建指令集
使用集成反汇编器的第一步是创建一个指令集来容纳你的指令布局:
/redmon isa create <isa-name> <instruction-size>
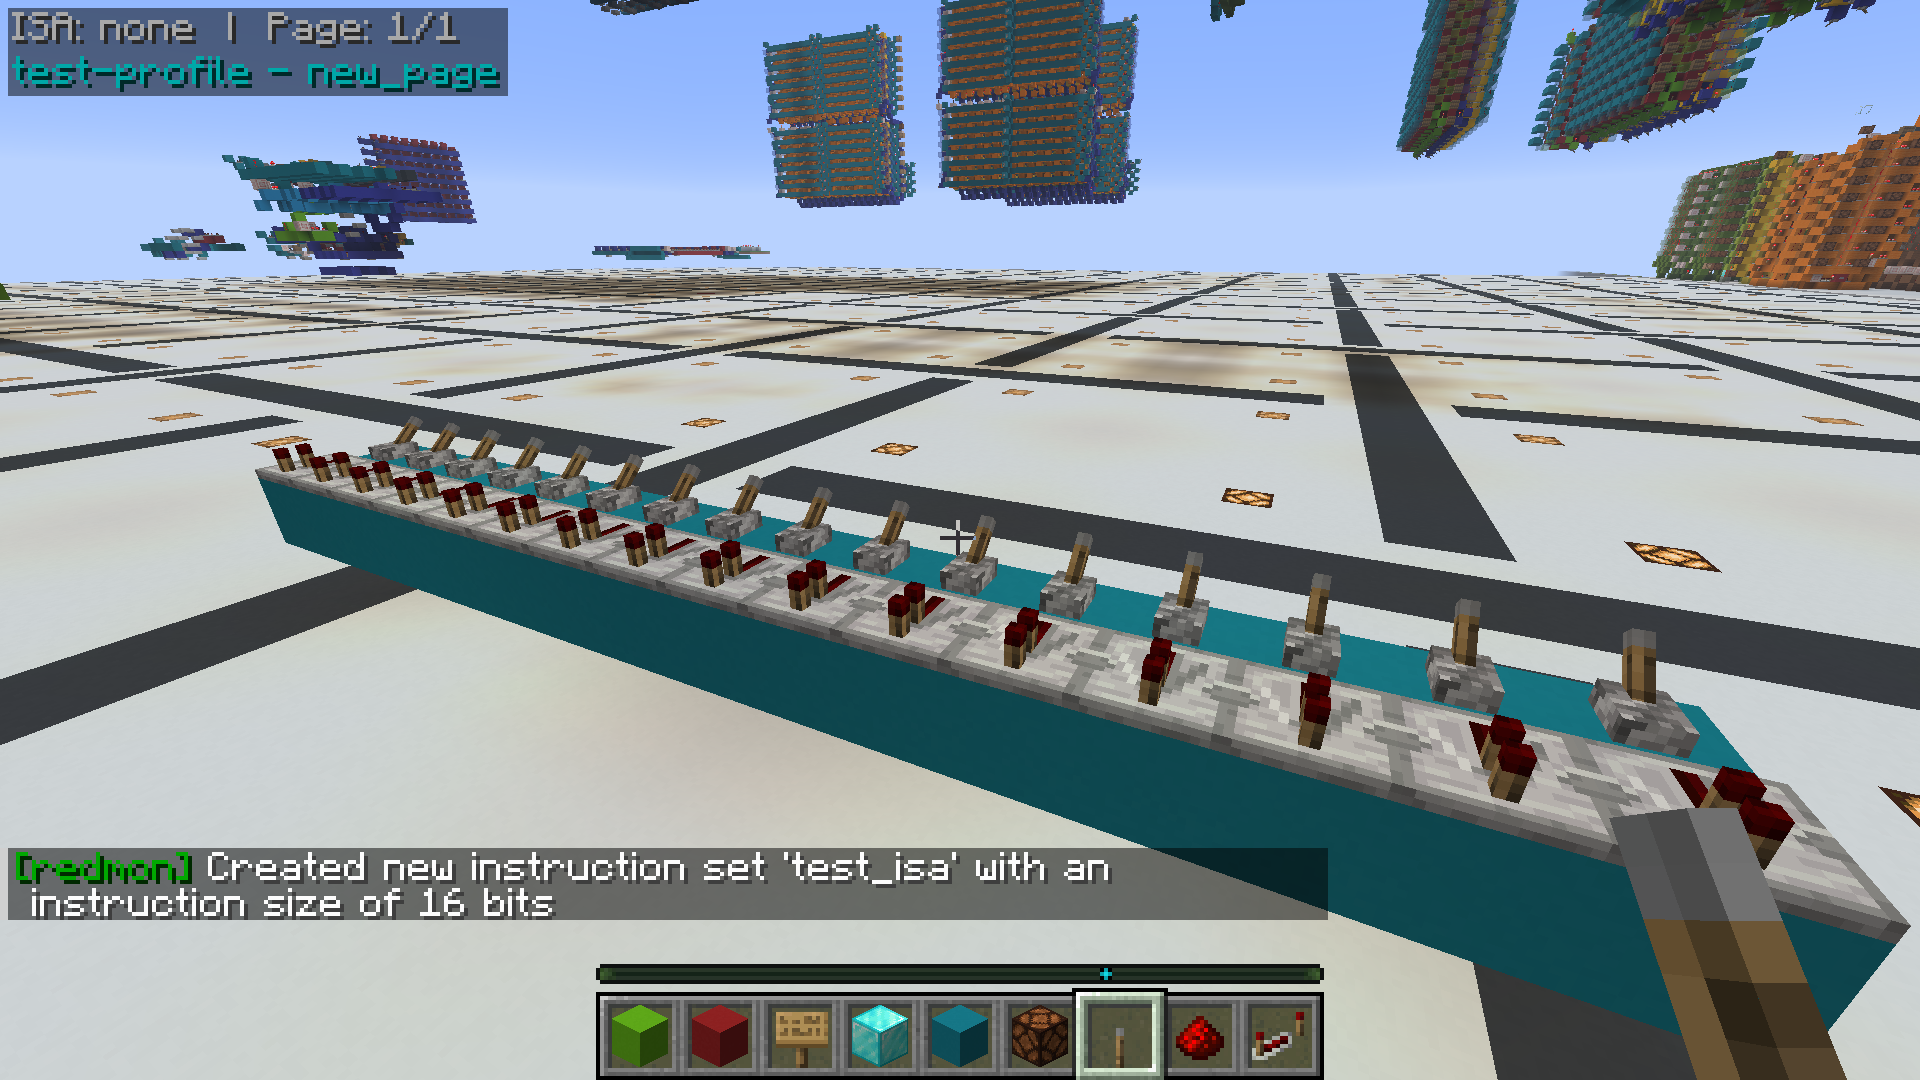
在上述情况下,已创建一个名为 test_isa 的 ISA,其宽度为 16 位。还可以使用以下命令查询现有的指令集:
/redmon isa list [<page>]
添加指令
创建 ISA 后,现在可以向其中添加指令。使用以下命令添加指令:
/redmon instruction add <isa-name> <instruction-name> <instruction-description> <instruction-fields>
<isa-name> - 要添加指令到的 ISA 的名称。<instruction-name> - 指令的名称(也是将在覆盖层中显示的助记符)。<instruction-description> - 描述,通常是对该指令功能的简短摘要。<instruction-fields> - 以分号分隔的指令字段说明符列表。
例如,以下命令创建一个名为 "ADDI" 的指令,包含一个五位的操作码 (01000)、一个七位的带符号立即数和一个四位的寄存器地址。该指令被添加到 test_isa 指令集中。
/redmon instruction add test_isa ADDI "Add signed immediate to a register." opcode:01000; imm_s:7; reg_rw:4
此命令的字段说明符分解如下:
opcode:01000 - 配置指令的操作码。imm_s:7 - 七位带符号立即数值。reg_rw:4 - 四位寄存器地址。
创建指令后,您可以按以下方式查看指令字段的详细分解:
/redmon instruction info test_isa ADDI
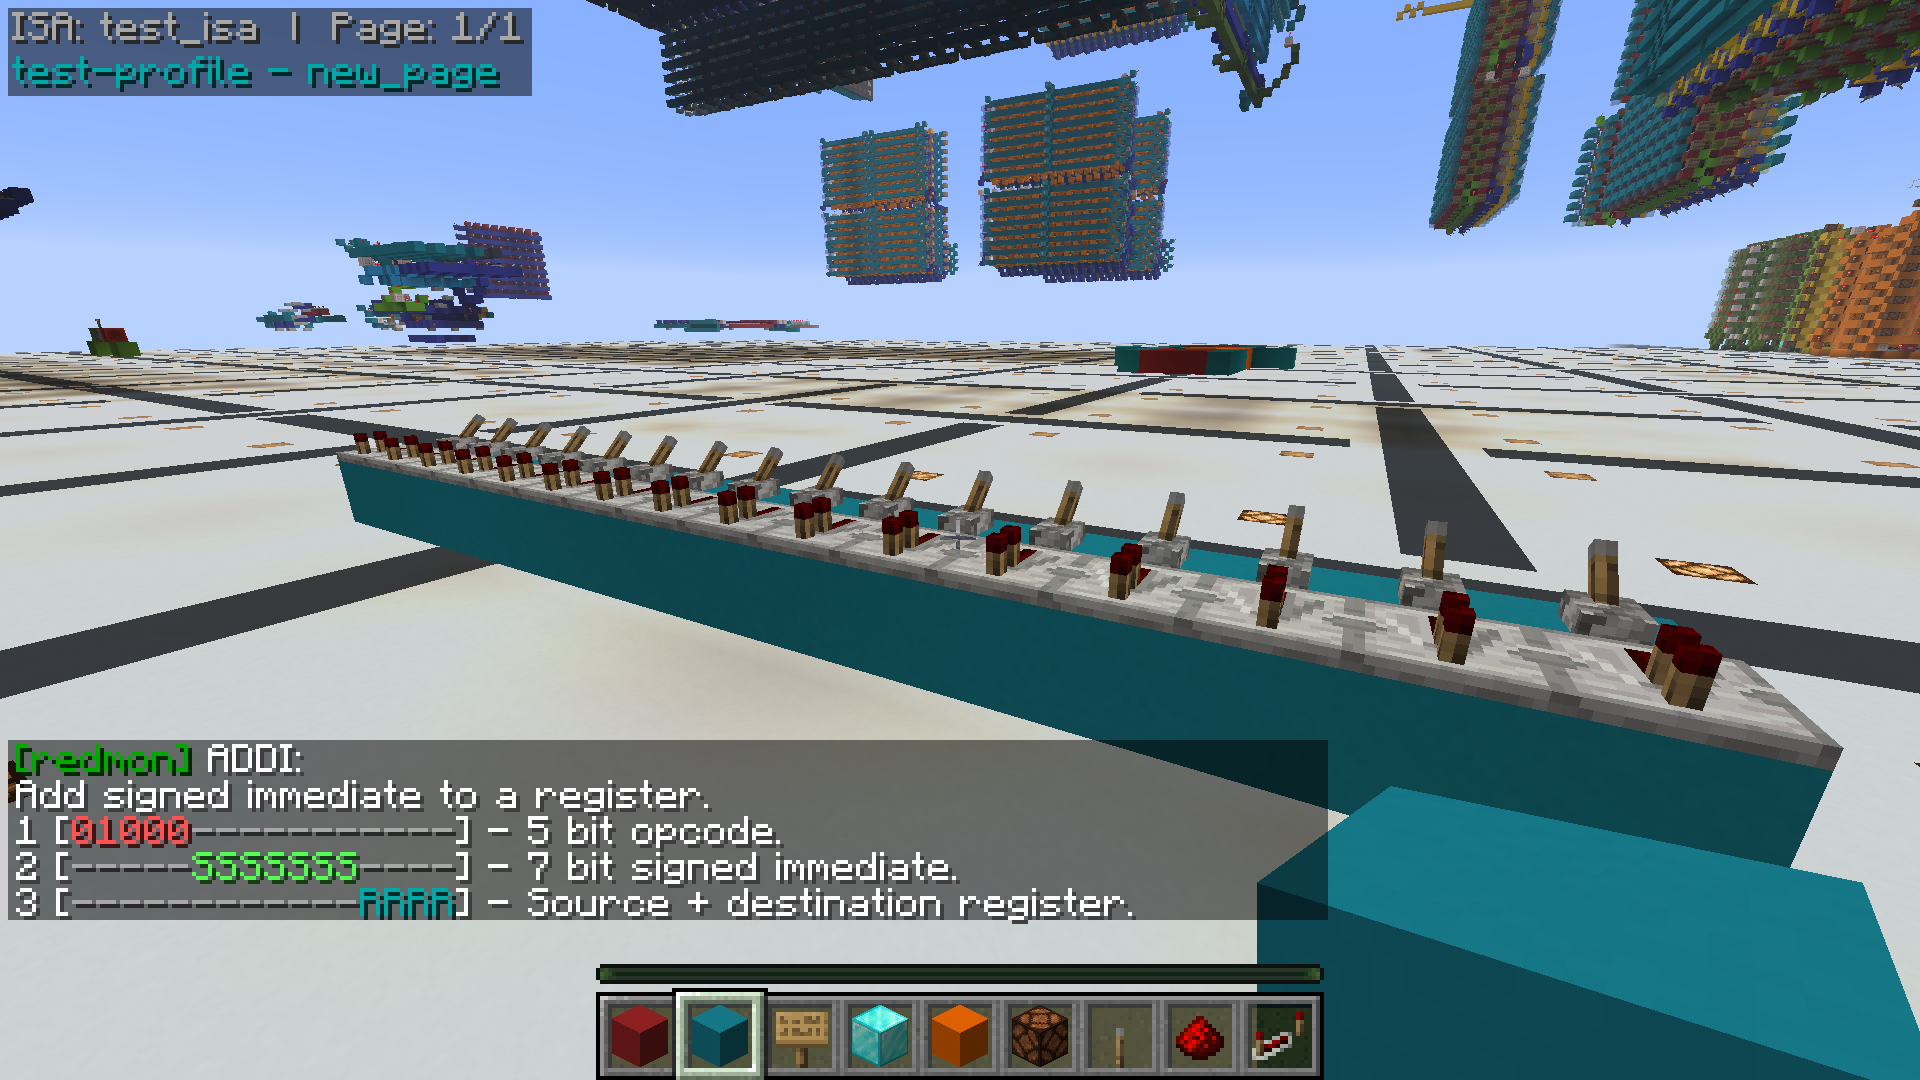
指令可以拥有任意数量的字段,但它们的总大小必须与指令集的宽度匹配,并且操作码不得与其他任何指令的操作码冲突。支持可变长度操作码。
可用的字段类型如下:
opcode:<bit pattern> - 操作码字段。flag_bit:<flag itentifier char> - 单个标志位,需要一个命名该标志的单字符。imm_s:<bit count> - 带符号立即数字段。imm_u:<bit count> - 无符号立即数字段。reg_r:<bit count> - 寄存器读取地址字段。reg_w:<bit count> - 寄存器写入地址。reg_rw:<bit count> - 寄存器读取 + 写入地址。ignore:<bit count> - 本指令忽略的位。
启用 ISA
创建 ISA 后,下一步是将其选择到当前配置页
(有关配置页创建的说明,请参阅 创建配置页)。以下命令将配置当前页面以使用选定的 ISA:
/redmon isa select <isa-name>
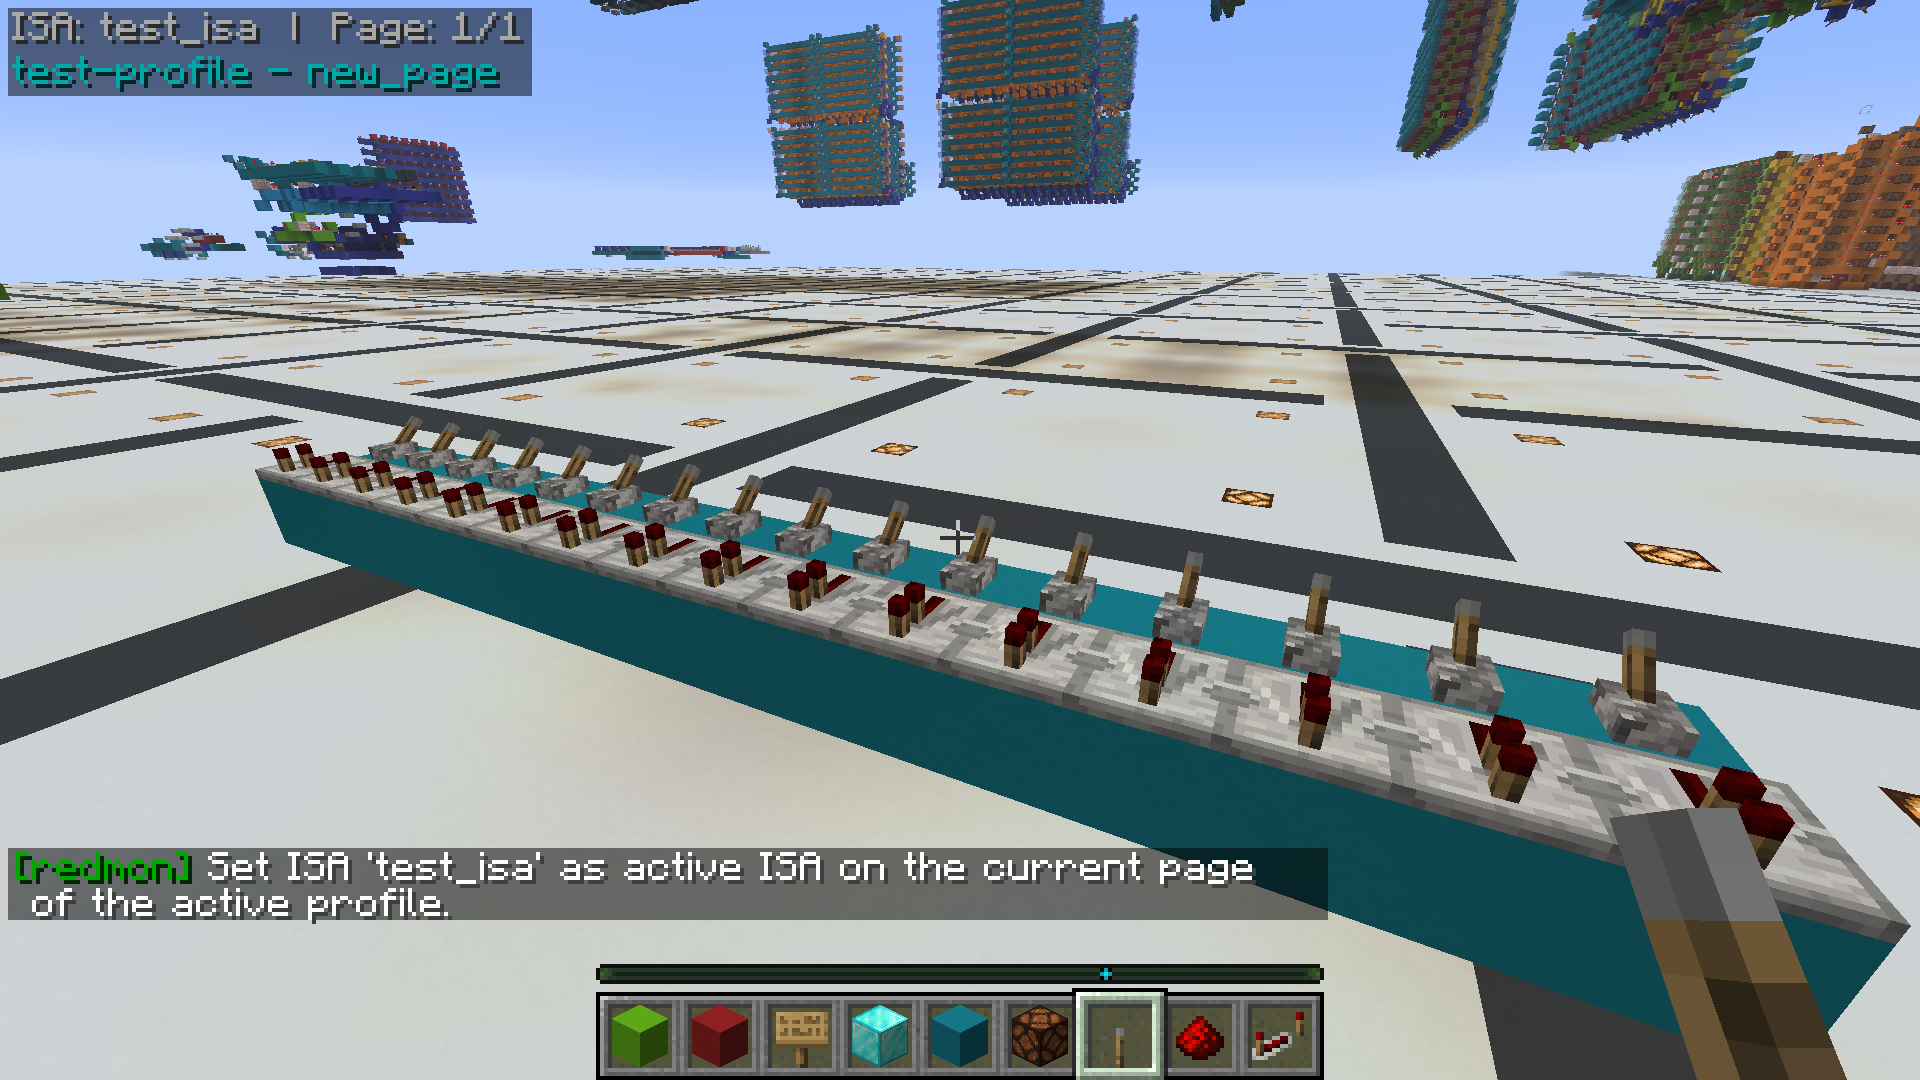
完成后,左上角会出现指示信息,表明已选定该 ISA。ISA 的选择是按页面进行的,允许单个配置页引用不同页面上的多个指令集。
查看信号反汇编
有两种查看反汇编的方法:一种是通过 ./redmon isa disassemble 命令,该命令将对直接传入命令中的指令进行反汇编;另一种是通过使用 asm 格式说明符格式化信号来选择 ISA。
在聊天栏中:/redmon isa disassemble <isa-name> (bin|dec|hex) <instruction-word>
在覆盖层中:/redmon signal format <signal-name> asm
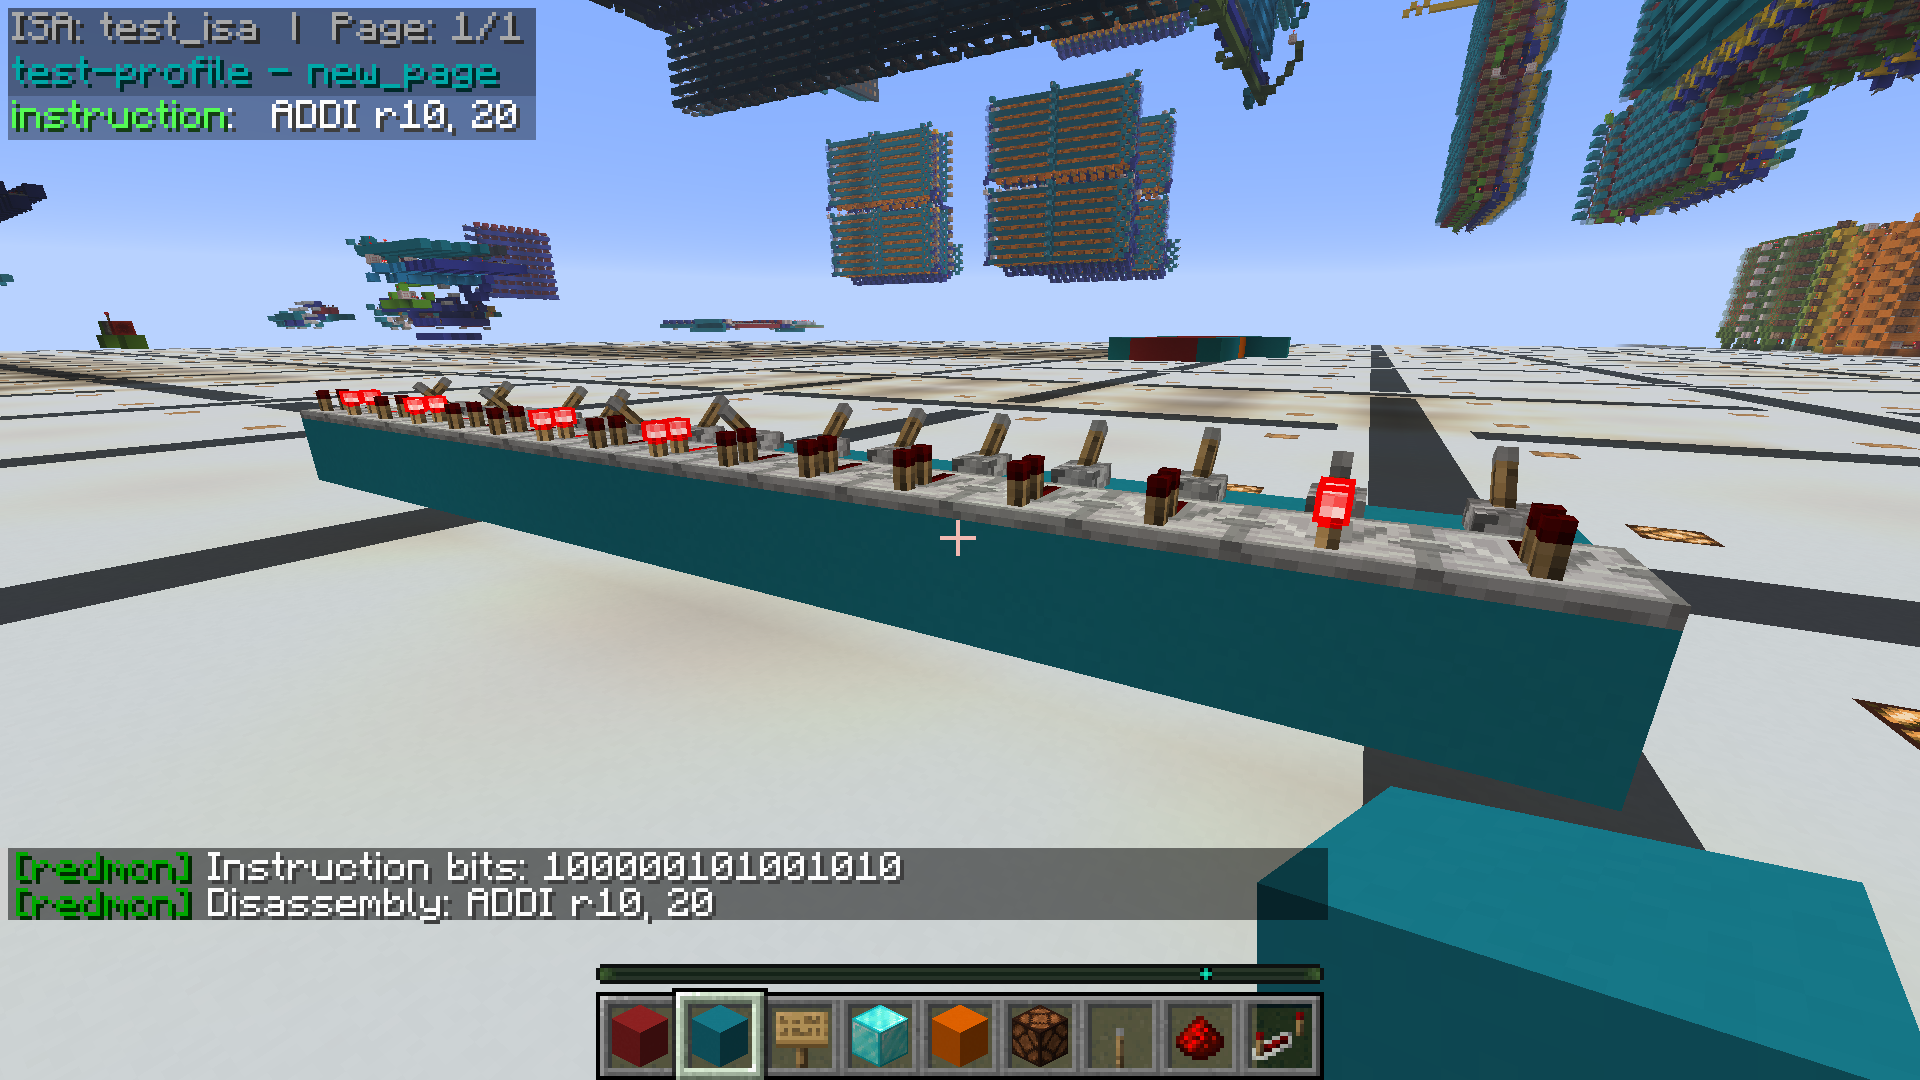
聊天栏和覆盖层中均显示带有指令反汇编的覆盖层:
如果无法识别该指令或信号中的位数不正确(多于或少于 ISA 的大小),则覆盖层中将显示错误信息。
Redmon
Redmon is a tool that allows you to create beautiful and functional in-game debug overlays for your redstone projects.
The mod is intended for computational redstone projects, but it can be used for just about anything. Currently the mod
supports the following blocks:
- Repeaters (on/off)
- Comparators (on/off)
- Torches (on/off)
- Redstone dust (on/off and signal strength)
- Redstone lamps (on/off)
Quickstart guide
Hotkeys
The mod has a small number of dedicated hotkeys for common operations.
= - Toggle visibility of the mod overlay.[ - Show previous profile page.] - Show next profile page.
These hotkeys may be configured in the game settings.
Creating a profile
Redmon functions using "profiles". Before any signals can be created or viewed, a profile must be created to contain
them. When you first load the mod, no profile will be selected (see top left). The first step to adding debug output to
your build is to pick an activation location for your profile and mark it so that you can find it later:
Once you've chosen your reference block, stand on top of it and create a profile:
/redmon profile create <profile-name>
This will create an empty profile with the specified name and set it as the current profile with respect to your
location in the world. After running this command, you should see the profile in the top left hand corner of your
screen like so:
new_page - The current page the profile is on (default name).test - The name of the created profile.
Profiles are stored on disk at the following path .minecraft/config/redmon_profiles.json and are saved automatically
as you make changes. You can view your saved profiles with the /redmon profile list and /redmon profile search
commands.
Existing profiles may be selected as follows:
/redmon profile select <profile-name>
Whenever a profile is selected, it is "mapped" onto the world relative to the current player position. This allows
profiles to be applied to designs regardless of their position in the world. It is recommended to mark the position
where the profile was created so you know where to stand when re-selecting it later!
If components are missing or the profile has been selected at the wrong location, and the mod is consequently unable to
find one or more blocks, errors will appear in the overlay like so:
You can also add additional pages to your profile which you can cycle through using hotkeys:
/redmon page add <page-name>
Finally, when you're done with the selected profile, you can run /redmon profile deselect to return the UI to its
default state.
Adding signals
A signal is made up of a block (or set of blocks) that you wish to monitor in the overlay. Signals are added by looking
at a block or wire and running the /redmon signal add command to add the signal to the currently active profile:
/redmon signal add <signal-name> <signal-type> <block-count>
There are currently 5 signal types to choose from:
repeater - Redstone repeater.torch - Redstone torch.dust_binary - Redstone dust (on or off).dust_ss - Redstone dust (signal strength).comparator_binary - Comparator.
The following screenshot depicts the outcome of running the command /redmon signal create dust dust_binary 1 while
looking a section of redstone dust. This command creates a single redstone dust signal with the name "dust":
It is also possible to add signals with multiple blocks in a single command. This is done by aiming the reticule at the
component that represents the most significant bit in the desired signal, and passing a block count greater than one,
like so:
/redmon signal create repeaters repeater 8
When creating a multi-block signal like this, the mod will search for additional matching blocks along the cardinal
direction which is closest to the player look angle. If the requested number of blocks aren't found, an error will be
displayed in the console. Be sure to face in the right direction when using this command!
Signals can also be removed, moved, renamed or reformatted using the following commands:
/redmon signal remove <signal-name>/redmon signal move <signal-name> (up|down) [<count>]/redmon signal move <signal-name> column <column-number>/redmon signal rename <signal-name> <new-signal-name>/redmon singal format <signal-name> <signal-format>
Integrated disassembler
Redmon contains an integrated disassembler which can perform on-the-fly disassembly of signals in the overlay. The
disassembler works by allowing the user to define an instruction set and then print instruction disassembly in the
overlay for selected signals. The disassembler also doubles as in-game documentation for the instruction set.
- Create an instruction set.
- Add instruction layouts to the instruction set.
- Assign an instruction set to current page of the active profile.
Creating an instruction set
The first step to using the integrated disassembler is to create an instruction set to contain your instruction
layouts:
/redmon isa create <isa-name> <instruction-size>
In the above case, an ISA with the name test_isa has been created with the width of 16 bits. Existing instruction
sets may also be queried with:
/redmon isa list [<page>]
Adding instructions
With the ISA created, instructions can now be added to it. Instructions are added using the following command:
/redmon instruction add <isa-name> <instruction-name> <instruction-description> <instruction-fields>
<isa-name> - The name of the ISA to add the instruction to.<instruction-name> - The name of the instruction (also the mnemonic that will appear in the overlay).<instruction-description> - Description, typically a short summary of what the instruction does.<instruction-fields> - A semicolon separated list of instruction field specifiers.
The following command for example creates an instruction called "ADDI" with a five bit opcode (01000), a seven bit
signed immediate value and a four bit register address. The instruction is added to the test_isa instruction set.
/redmon instruction add test_isa ADDI "Add signed immediate to a register." opcode:01000; imm_s:7; reg_rw:4
Field specifier breakdown for this command:
opcode:01000 - Configures the opcode for the instruction.imm_s:7 - Seven bit signed immediate value.reg_rw:4 - Four bit register address.
Once the instruction is created, you can view a detailed breakdown of the instruction fields like so:
/redmon instruction info test_isa ADDI
Instructions can have as many fields as you like, but their total size must match the width of the instruction set, and
the opcode must not collide with that of any other instruction. Variable length opcodes are supported.
Available fields types are as follows:
opcode:<bit pattern> - Opcode field.flag_bit:<flag itentifier char> - Single flag bit, expects a single character which names the flag.imm_s:<bit count> - Signed immediate field.imm_u:<bit count> - Unsigned immediate field.reg_r:<bit count> - Register read address field.reg_w:<bit count> - Register write address.reg_rw:<bit count> - Register read + write address.ignore:<bit count> - Bits ignored by this instruction.
Enabling the ISA
Once an ISA is created, the next stage is to select it to the current profile page
(see creating a profile for profile creation instruction). The following command will configure
the current page to use the selected ISA:
/redmon isa select <isa-name>
Once done, an indication will appear in the top left that the ISA is selected. ISA selections work on a per-page
basis, allowing a single profile to reference several instruction sets on different pages.
Viewing signal disassembly
There are two ways to view disassembly, one is with the ./redmon isa disassemble command, which will disassemble an
instruction passed directly in the command, and the other is by selecting the ISA by formatting a signal with the asm
format specifier.
In the chat: /redmon isa disassemble <isa-name> (bin|dec|hex) <instruction-word>
In the overlay: /redmon signal format <signal-name> asm
Overlay with instruction disassembly in the chat and in the overlay:
If the instruction is not recognised or the wrong number of bits are present in the signal (more or less than the isa
size), then an error will be shown in the overlay.


 模组

 模组

 模组
 模组
 模组
 模组
评论 0
登录后参与评分
还没有评论,来抢沙发吧