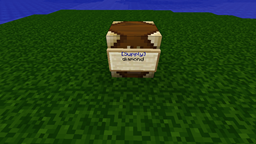
SupplySign - 使用此插件,您可以通过创建 [Supply] 告示牌向玩家分发物品和方块。右键点击这些告示牌时,会打开一个箱子界面。这些告示牌也可以放置在箱子和发射器上。
基本操作:
- 放置一个告示牌
- 将第一行设置为 [Supply]
- 在其余的每一行上,输入供应告示牌内容的名称(或物品 ID)
- 右键点击告示牌以打开箱子。
箱子告示牌: 要在箱子上放置告示牌,请确保该位置距离其他箱子至少一个方块远。将您的供应告示牌放在箱子旁边的地面上,在您完成告示牌的编辑后,它会自动附着到箱子上。右键点击告示牌或箱子即可显示告示牌的内容。如果您愿意,您可以在大型箱子上放置两个告示牌。
发射器: 将告示牌附着到发射器上的方式与附着到箱子上相同。发射器的库存将始终装满告示牌上指定的物品。如果您使用了套件(kit),或者在告示牌上放置了多个物品,则只会使用第一个物品。请记住,发射器需要红石信号才能激活,因此在附着告示牌之前,最好先连接好电路并测试一下。如果去掉 SupplySign 插件后发射器无法正常工作,那么我也帮不了您(我不是红石专家)。
使用套件(Kits): 要使用套件,像往常一样将第一行设置为 [Supply],然后在第二行输入“kit:”后跟套件名称,例如 “kit:wool”。默认套件包括:wool, dye, woodtools, woodplus, irontools, ironplus, diamondtool, diamondplus, goldtools, goldplus, desert, makecake, chainmail
权限: 管理员(Ops)以及拥有 "supplysign.create" 权限的玩家能够放置供应告示牌。管理员(Ops)以及拥有 "supplysign.access" 权限的玩家能够访问这些告示牌。管理员(Ops)以及拥有 "supplysign.destroy" 权限的玩家能够破坏现有的供应告示牌。管理员(Ops)以及拥有 "supplysign.reload" 权限的玩家能够触发物品/套件数据的重载。拥有 "supplysign.access.kitname" 权限的玩家可以访问名为 "kitname" 的套件。
如果您不使用权限系统:只有管理员(Ops)能够放置 SupplySigns。配置文件中有选项允许非管理员玩家访问告示牌,但不能放置它们。
数据文件: 插件首次加载后,会在 bukkit plugins 文件夹中创建一个名为 "supplysign" 的数据文件夹,其中包含两个文件:items.csv 和 kits.yml。您可以自定义这些文件以添加新套件或修改物品名称。使用 "/supplysign reload" 命令来加载您的更改而无需重启服务器。注意:在编辑这些文件时,请确保格式不发生改变。在 Windows 系统上,请使用类似 Wordpad 的工具。有报告指出 OpenOffice 可能会以破坏插件的方式更改文件。
配置文件: 用于配置 ShowErrorsInClient、FixSignOnSignGlitch 和 AllowNonOpAccess 选项。请查看自动生成的 config.yml 文件以获取更多信息。
问题/评论/故障排除: 欢迎在下面发布问题或评论。希望其他插件用户能看到您的求助并提供帮助,因为我不总是有足够的时间来处理安装问题或回答诸如“如何制作套件?”之类的问题。
SupplySign - Use this plugin to distribute items and blocks to your players by creating [Supply] signs that load a chest interface when right-clicked. These signs can also be placed on chests and dispensers.
The Basics:
- Place a sign
- Set the first line to [Supply]
- On each of the remaining lines, put the name(or item id) of the contents of the supply sign
- Right-click the sign to open the chest.
Chest Sign: To place a sign on a chest, make sure it is not within one block of another chest. Place your supply sign on the ground next to the chest and it will attach itself to the chest after you are done editing the sign. Right-clicking the sign or the chest will display the contents of the sign. If you want, you can put two signs on a large chest.
Dispensers: Attach a sign to a dispenser in the same way you would attach one to a chest. The inventory of the dispenser will always be full of whatever is on the sign. If you use a kit, or if you put multiple items on the sign, only the first will be used. Remember that dispensers require redstone to activate, so it might be a good idea to wire up the dispenser and test it before attaching the sign. If the dispenser doesn't work without a SupplySign on it, then I can't help you (I'm no redstone expert).
Using Kits: To use a kit, set the first line to [Supply] as usual, then put "kit:" followed by the kit name on the second line, ie. "kit:wool". Default Kits: wool, dye, woodtools, woodplus, irontools, ironplus, diamondtool, diamondplus, goldtools, goldplus, desert, makecake, chainmail
Permissions: Ops and players with the "supplysign.create" permission will be able to place supply signs. Ops and players with the "supplysign.access" permission will be able to access them. Ops and players with the "supplysign.destroy" permission can destroy existing supply signs. Ops and players with the "supplysign.reload" permission can trigger a reload of items/kits data. Players with "supplysign.access.kitname" can access the kit called "kitname".
If you don't use permissions: Only Ops will be able to place SupplySigns. There is a config file option that will allow non-op players to access signs, but not place them.
Data Files: After the plugin has been loaded for the first time, a "supplysign" data folder will be created in the bukkit plugins folder with two files in it: items.csv and kits.yml. You can customize these files to add new kits or modify item names. Use "/supplysign reload" to load your changes without restarting the server. NOTE: When editing these files, make sure the format doesn't change. On Windows, use something like Wordpad. There has been a report that OpenOffice can change the files in a way that breaks the plugin.
Config File: Used to configure the ShowErrorsInClient, FixSignOnSignGlitch, and AllowNonOpAccess options. Check out the (automatically created) config.yml file for more info.
Questions/Comments/Problems: Feel free to post questions or comments below. Other plugin users will hopefully see your plea for help and lend a hand, since I don't always have enough time to help with installation issues, or questions like "how do I make a kit?".

 插件

 插件
 插件
 插件
 插件
 插件
评论 0
登录后参与评分
还没有评论,来抢沙发吧