简单来说,这是一个模组,允许你选取一个方块的模型、碰撞箱等属性,并为其应用不同的纹理。
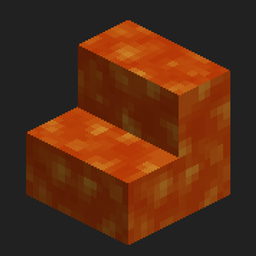
例如,你可以选取楼梯方块,并将任何其它方块的纹理应用到它上面。栅栏以及游戏中的所有其他方块也可以这样做。
使用方法
很简单!目前游戏中没有制作配方,因此在生存模式下使用此模组的唯一方法是自行创造。未来会加入制作配方。要使用此模组,首先拿起一张“方块捕获卡”(Block Capture Card),右键点击你想要作为模型的方块。然后,获取一张新的“方块捕获卡”,右键点击你想要作为纹理的方块(如果你想使用液体作为纹理,请使用“液体捕获卡”)。放置一台“隐形机”(Cloaking Machine)并打开它。在左上角放入用于定义模型的方块的捕获卡,在右上角放入用于定义纹理的方块的捕获卡。此时你会看到模型渲染在屏幕中央。(按住右键可以移动模型)。当你满意你的模型后,将一块“隐身方块”(Cloak Block)放入左侧槽位(按住 Shift 键点击即可),然后点击标有“Cloak”的按钮。这将把输出物品设置为带有隐身的方块。现在你可以让你的世界变得更加精彩!如果你仍然需要帮助,请参阅下方的视频。
独立面纹理化
此模组还包含独立面纹理化的功能。这意味着你可以让一个方块的顶部纹理是石头,而侧面纹理是泥土。要做到这一点,请进入“隐形机”,放入你的模型和基础纹理的捕获卡。然后,左键点击你想要更改的面。该面会被高亮显示,并在右上角出现一个新的槽位。放入你想要该特定面更改为的捕获卡,即可完成操作。你的模型应该会在中央渲染出来。然后将一块隐身方块放入左侧槽位,点击按钮即可。如果你仍然需要帮助,请参阅下方的视频。
外部纹理
以下说明已过时。系统将在下一次更新中更改
请注意,这仍处于非常早期的测试阶段,尚不能在服务器上运行。
首先,在游戏启动后,前往游戏的运行目录 / .minecraft(操作方法可在此处找到)。应该有一个名为 "cloak-images" 的文件夹。如果没有,请创建它。然后,将你希望在游戏内使用的图片放入该文件夹。目前不进行图像尺寸检查,因此图片不必是正方形或 16x16,但否则可能会导致纹理出错。将纹理放入该文件夹后,进入游戏,使用“外部捕获卡”(External Capture Card)右键点击。你应该能看到该文件夹中所有文件的列表(界面尚未完成,目前仅为占位符)。输入你想要使用的图片的名称(包括文件扩展名),然后按回车键。如果成功,图片将渲染在项目内部。然后你可以像使用其他捕获卡一样使用这张捕获卡。如果需要更多帮助,请参阅下方的视频。
计划
- 添加漏斗支持以实现自动化
- 红石信号的作用方式与点击“Cloak”按钮相同
- 2 个等级的“隐形机”,其中一个可以选择面,另一个不能。
有建议吗?请在问题追踪器中留下你的建议,我很乐意查看。
此模组与 Paint ALL the things! 非常相似,但构思和编码是独立的,后者包含了一些此模组所没有的功能。如果你喜欢这个模组,请务必去看看那个模组。
视频链接:
To put it short, this is a mod that allows you to take one blocks model and colliding box and all that stuff, and put a diffrent texture onto it.
For example, you can take the stair block, and but ANY other blocks texture on it. You can do the same with fences, and every other block in the game.
How to use
Its simple! There are currently no crafting recipes in the game, so they only way to use this mod in survival would be to create your own. There will be recipes in the future. To use this mod, first take a Block Capture Card and right click on the block you want as the model. Then, get a new Block Capture Card, and right click on the block you want as the texture (If you want a liquid as the texture, please use the Liquid Capture Card). Place down the Cloaking Machine, and open it. At the top left place the Capture Card for the block you want to be the model, and at the top right, the Capture Card for the block you want to use a the texture. You will then see the model being rendered in the center of the screen. (Holding right click will move the model around). Once you are happy with your model, place a Cloak Block in the slot to the left (shift clicking it will do), then click the button labled "Cloak". This will then set the output item to be the Cloaked Block. Now you can go and make your world just that much better! If you still require help, consult the videos below.
Indevidual face texturing
Also included within this mod is indevidual face texturing. That means you can have a block with the top texture being stone, and the sides being dirt. To do this go into the Cloaking Machine, and place your model and base texture Capture Cards. Then, left click on the face you want to change. It will be highlighted, and in the top right a new slot will appear. Place the capture Card you want the certian face to change to and there you go. Your model should be rendering in the center. Then just put a Cloak Block in the left slot, click the button and there you go. If you still require help, consult the videos below.
External textures
INSTRUCTIONS BELOW ARE OBESLEATE. SYSTEM IS CHANGING IN NEXT UPDATE
Please note that this is still in very early testing, and does not yet work on servers.
Firstly, after you load up the game, go to your games run directory / .minecraft (Instructions on how to do that can be found here). There should be a folder called "cloak-images". If not then create it. Then, put the images you want to use in-game into that folder. There is currently no image size checking, so it dosnt have to be a square, or 16x16, although the texture may bug out if otherwise. Once you've put the texture into that folder, go in game, and right click with the External Capture Card. You should see a list of all files within that folder (Gui isnt finished, its just a placeholder for now). Type in the name (and file extension) of the image you want to use, then press enter. If it has worked, the image will be rendered inside the item. You can then use the Capture Card in the same way as other capture cards. If you need more help on this, consult the videos below.
Plans
- Add hopper support so it can be automated
- Redstone signal acts the same way as clicking the "Cloak" button
- 2 tiers of Cloaking Machine, one can select faces, the other can't.
Have a suggestion? Please leave it at the issue tracker and Ill be more than happy to take a look at it
This mod is very similar, but thought of and coded independently, to Paint ALL the things!, which includes some features this mod does not. If you enjoyed this mod, please go check it out.
Link to videos:

 模组

 模组

 模组

 模组

 模组

 模组

评论 0
登录后参与评分
还没有评论,来抢沙发吧